After finishing the blue paint (see part 1), my Superbench cabinet was now ready for final assembly with artwork, sound and electronics.
The first part I installed is the power connector to the back of the cabinet. This nice unit has built-in fuse protection as well as a power switch in addition to the IEC connector. Definitely gives the cabinet a more professional look vs a power cable dangling out the back!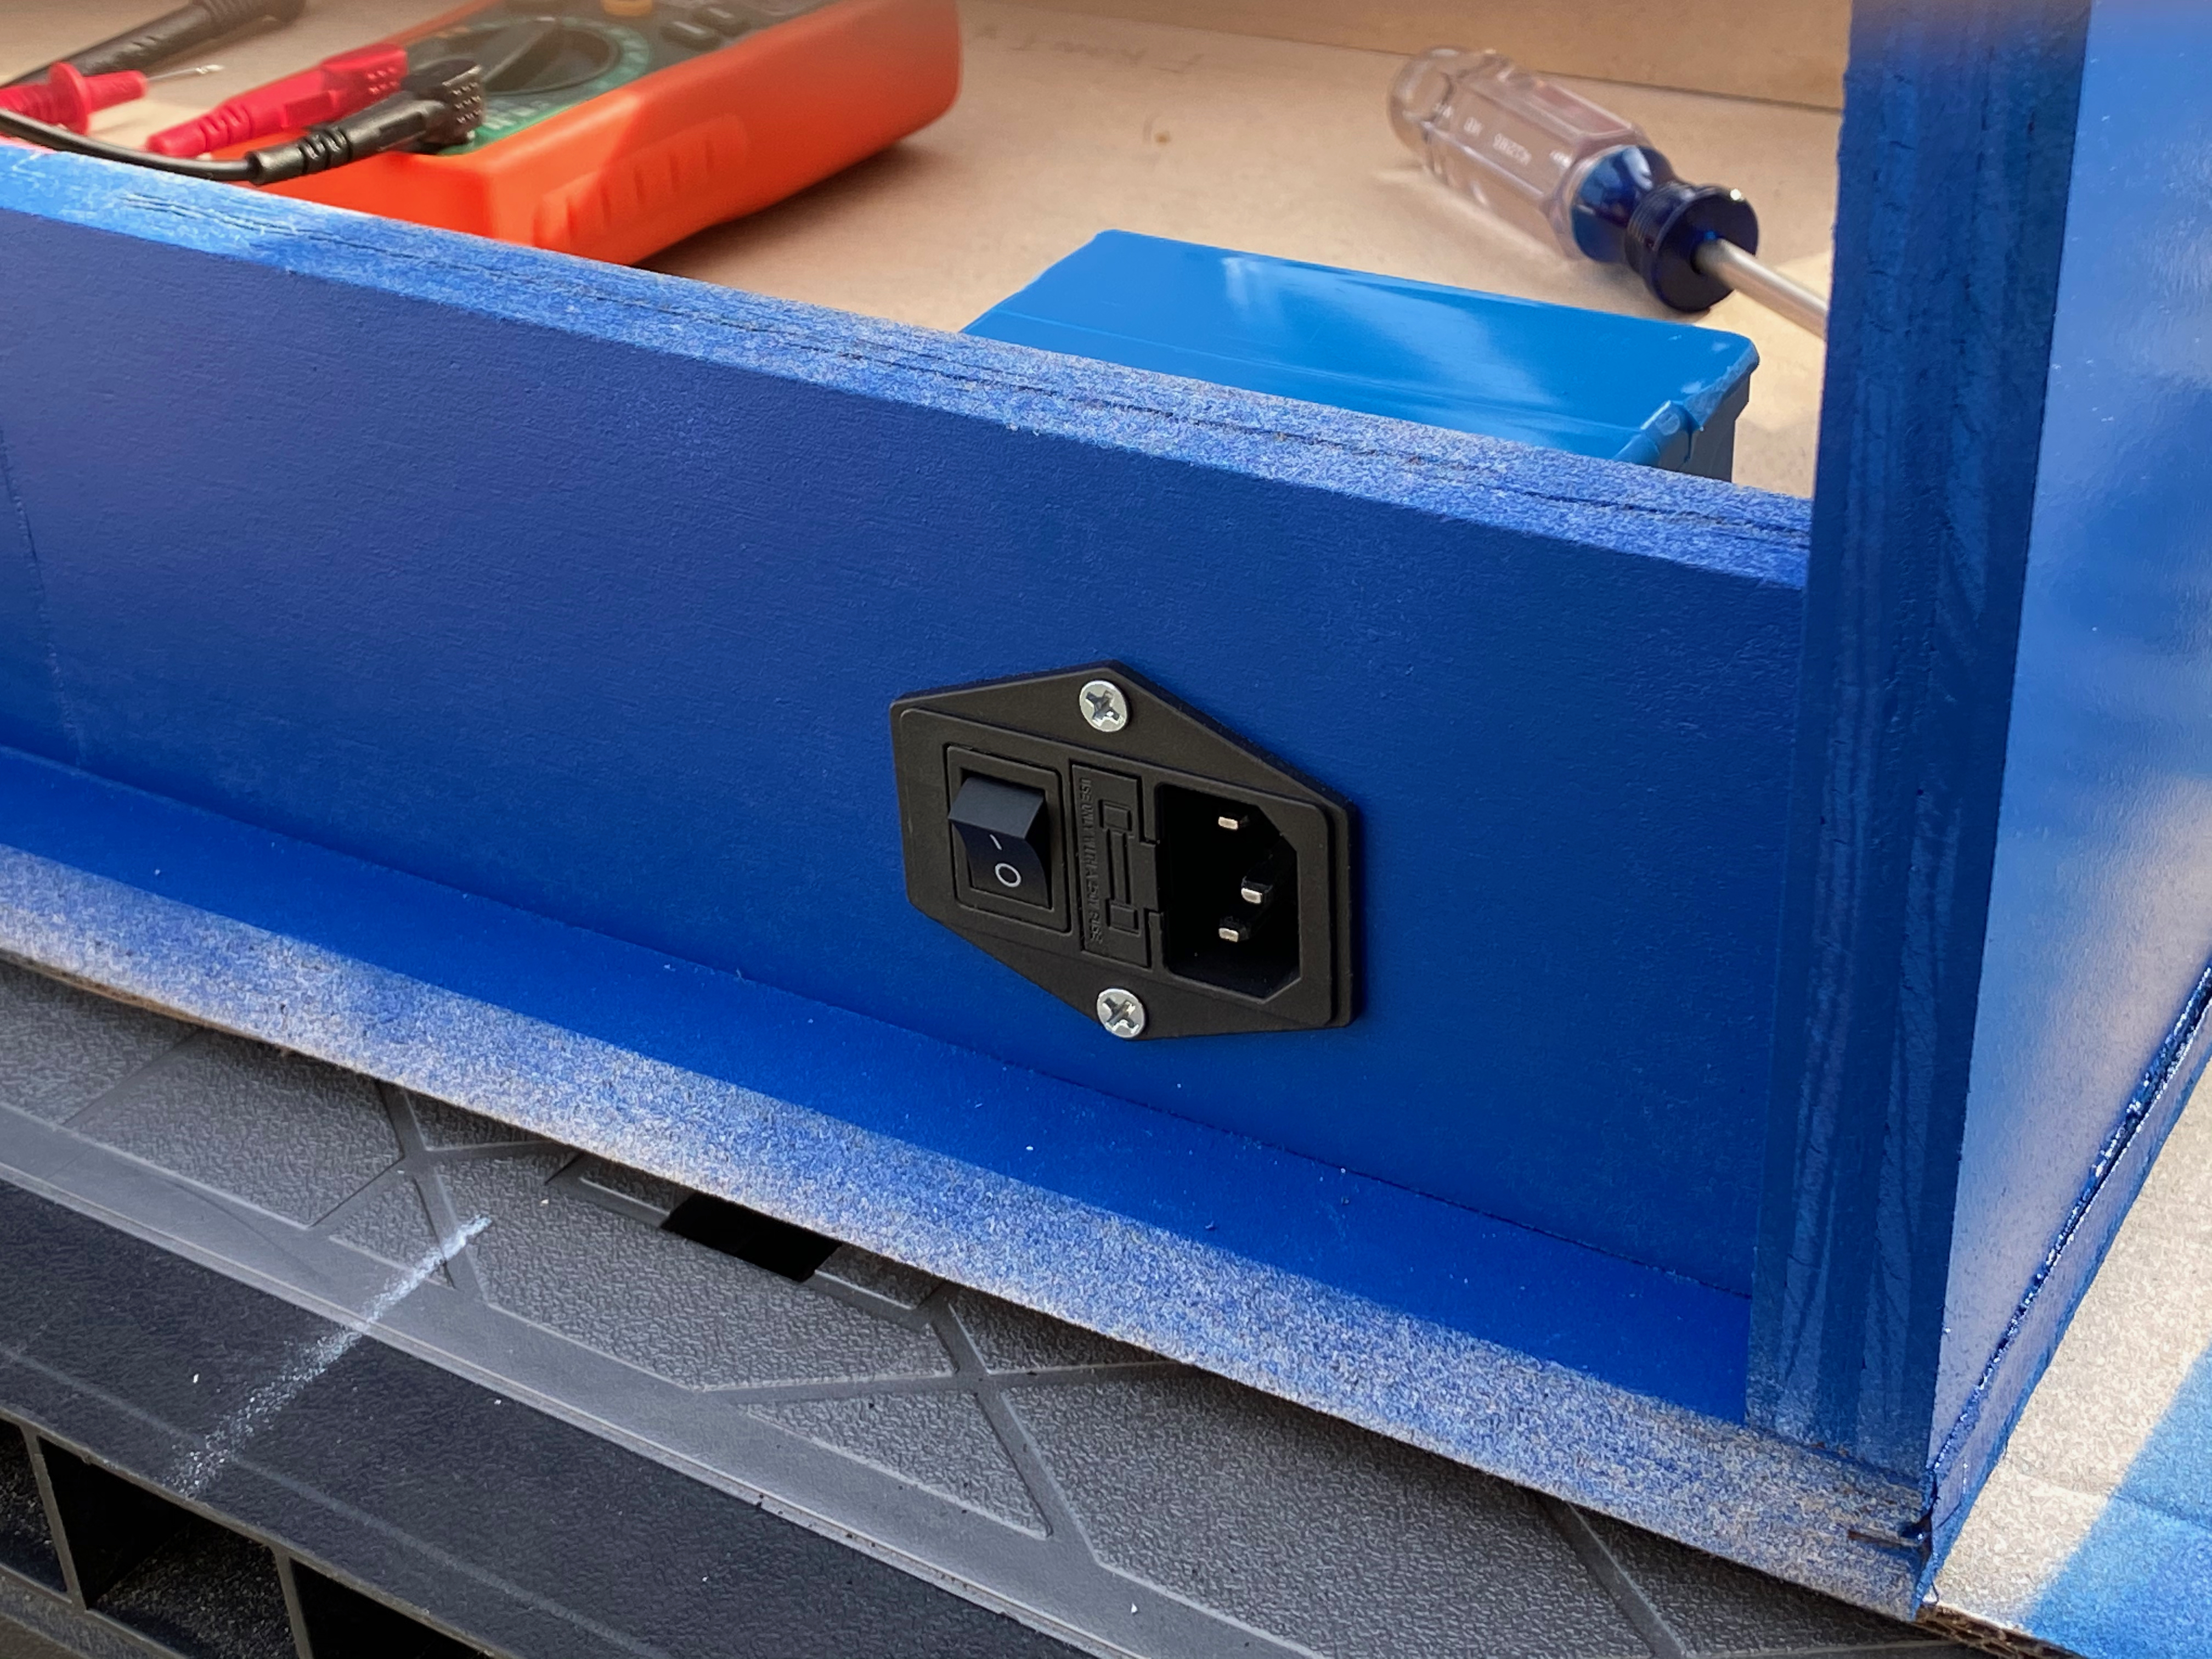
Next up, parts for the front! I installed the speaker panel vinyl graphics I had printed with Escape Pod Online and it turned out great. They were printed on really nice material which made installation easy without any bubbles. The woofer and the DIN-15 connector panel for the controllers went on next. Looking good!
Speaking of the controllers though, here’s how I tackled those. I started with two identical MadCatz TE sticks bought on Craiglists – they’re nice enough quality controllers built with arcade-grade Sanwa components. They were originally of the PS3/XBox 360 era and connected over USB, but that mattered little since I wasn’t going to re-use their electronics. Instead, I chopped all of it out and wired each switch directly to individual wires of a DIN-15 cable (hence the DIN-15 connector panel on the cabinet).
Before: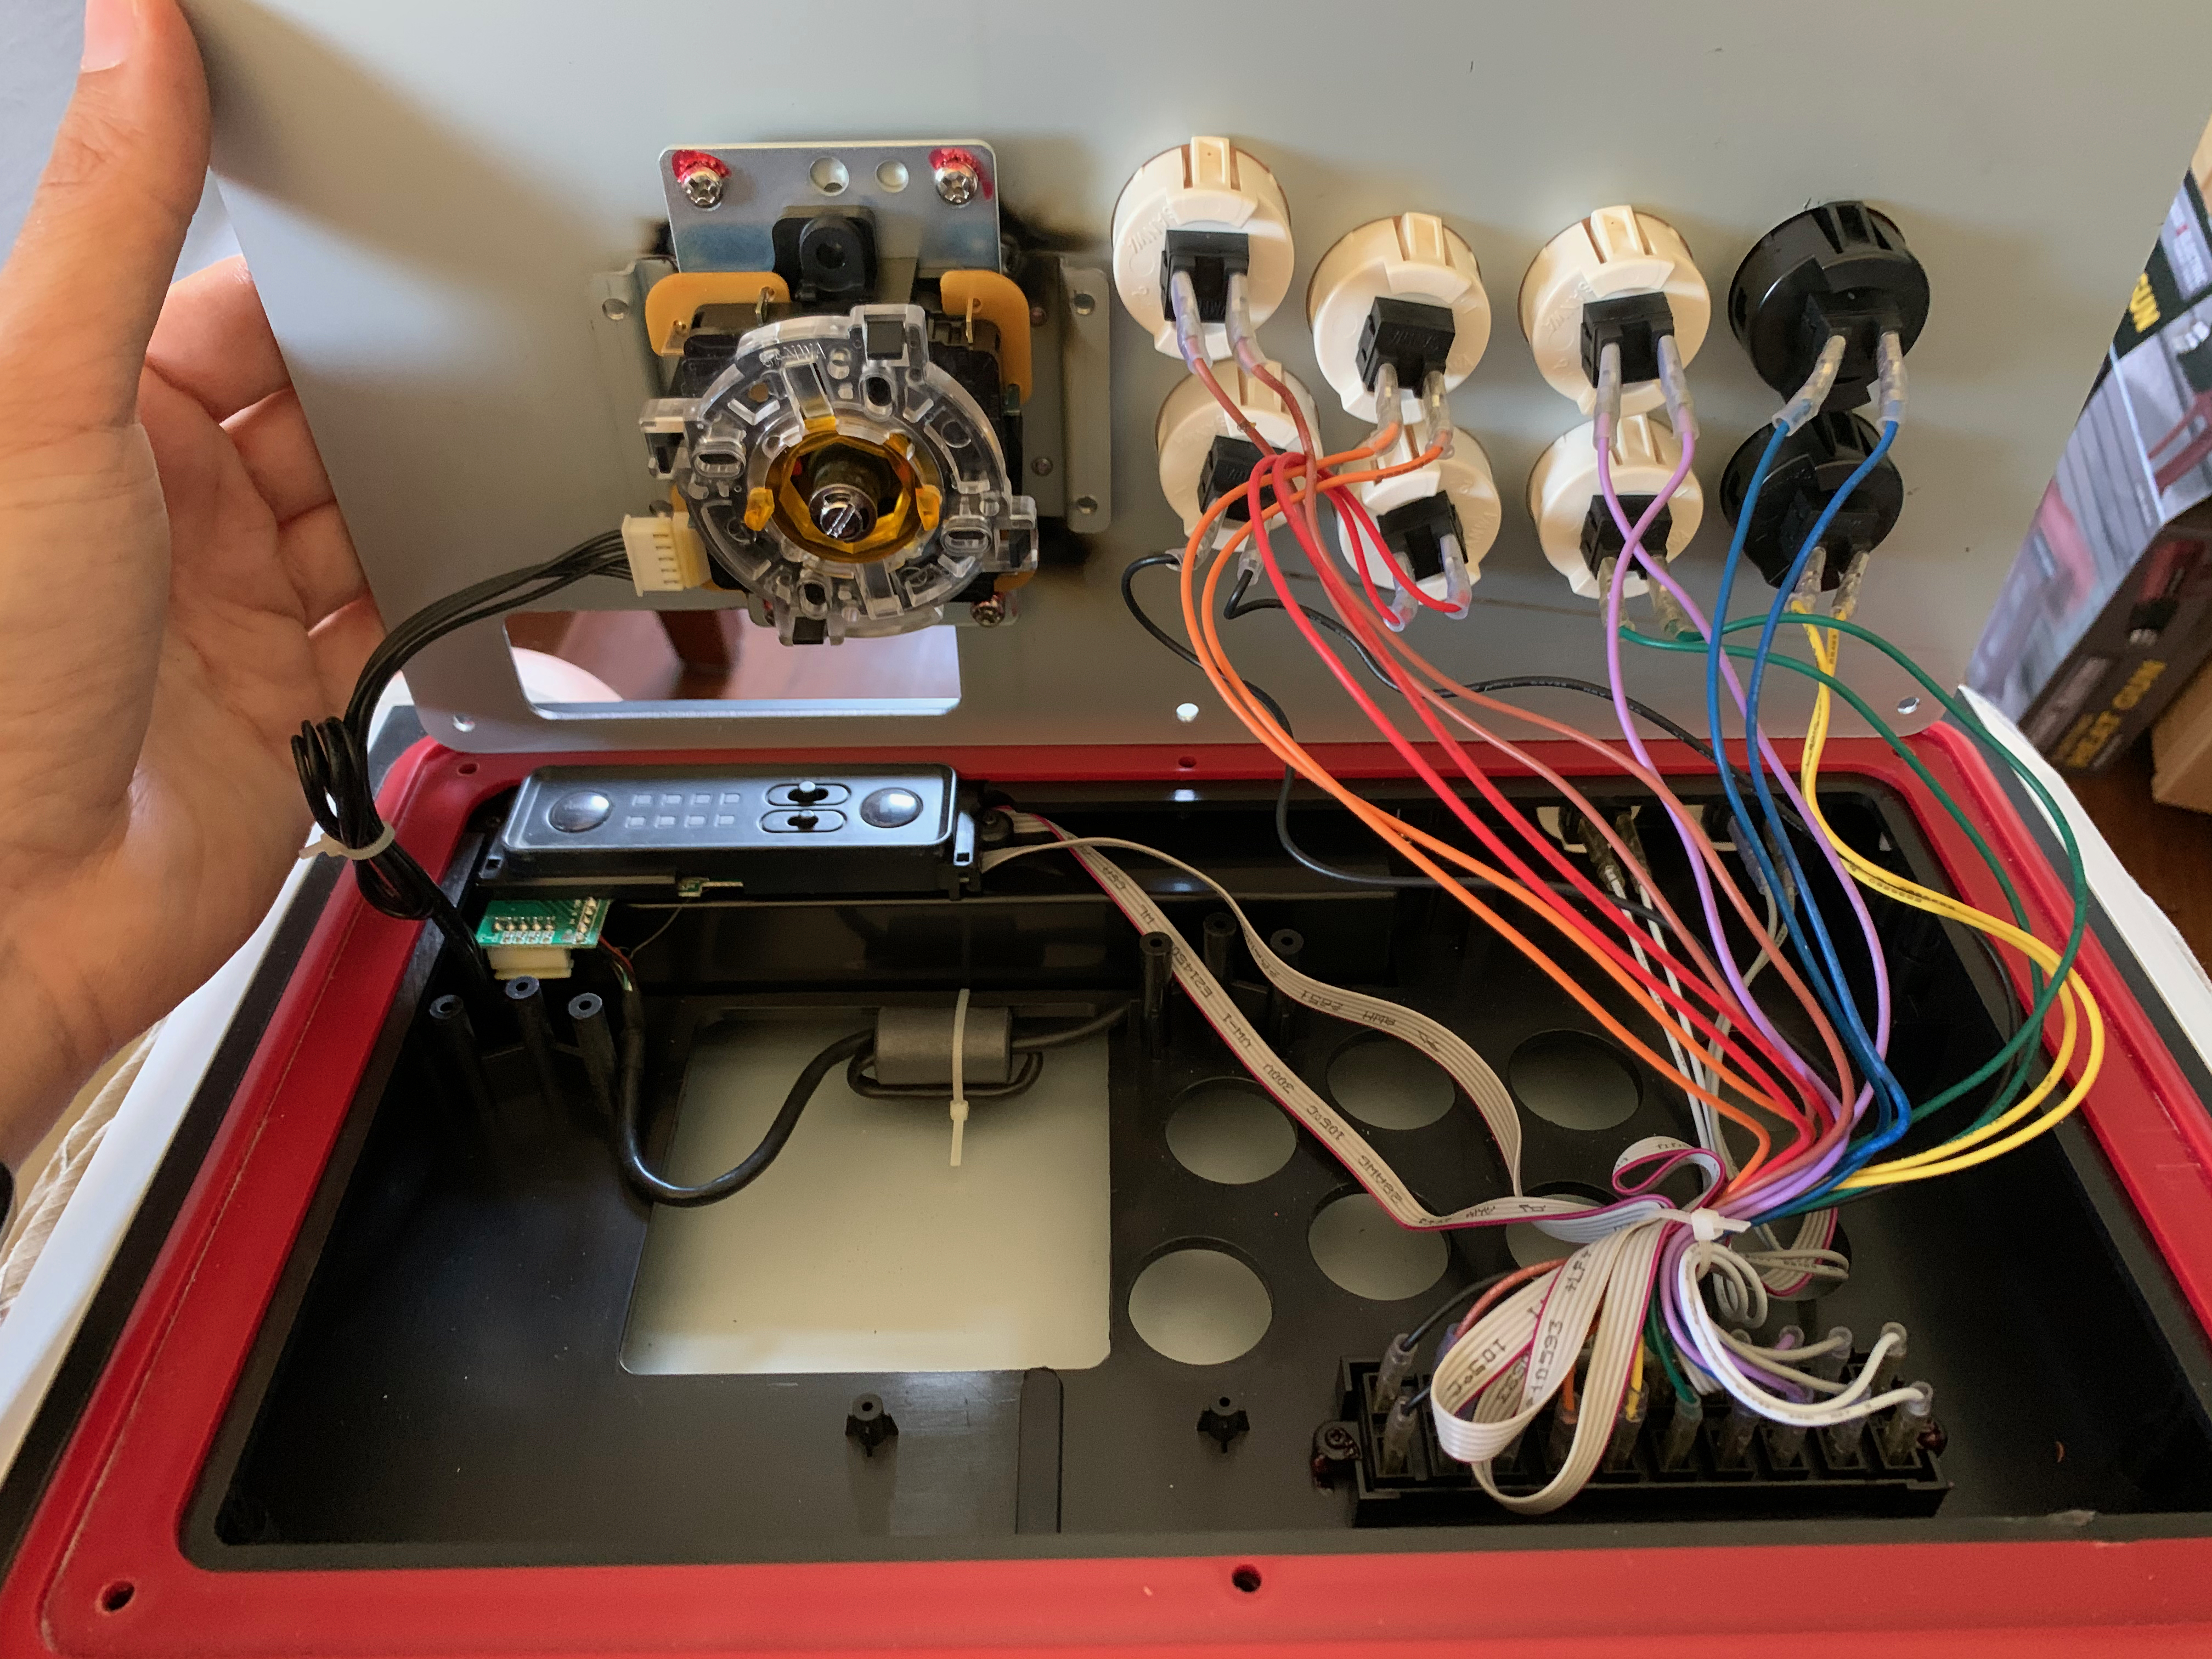
After: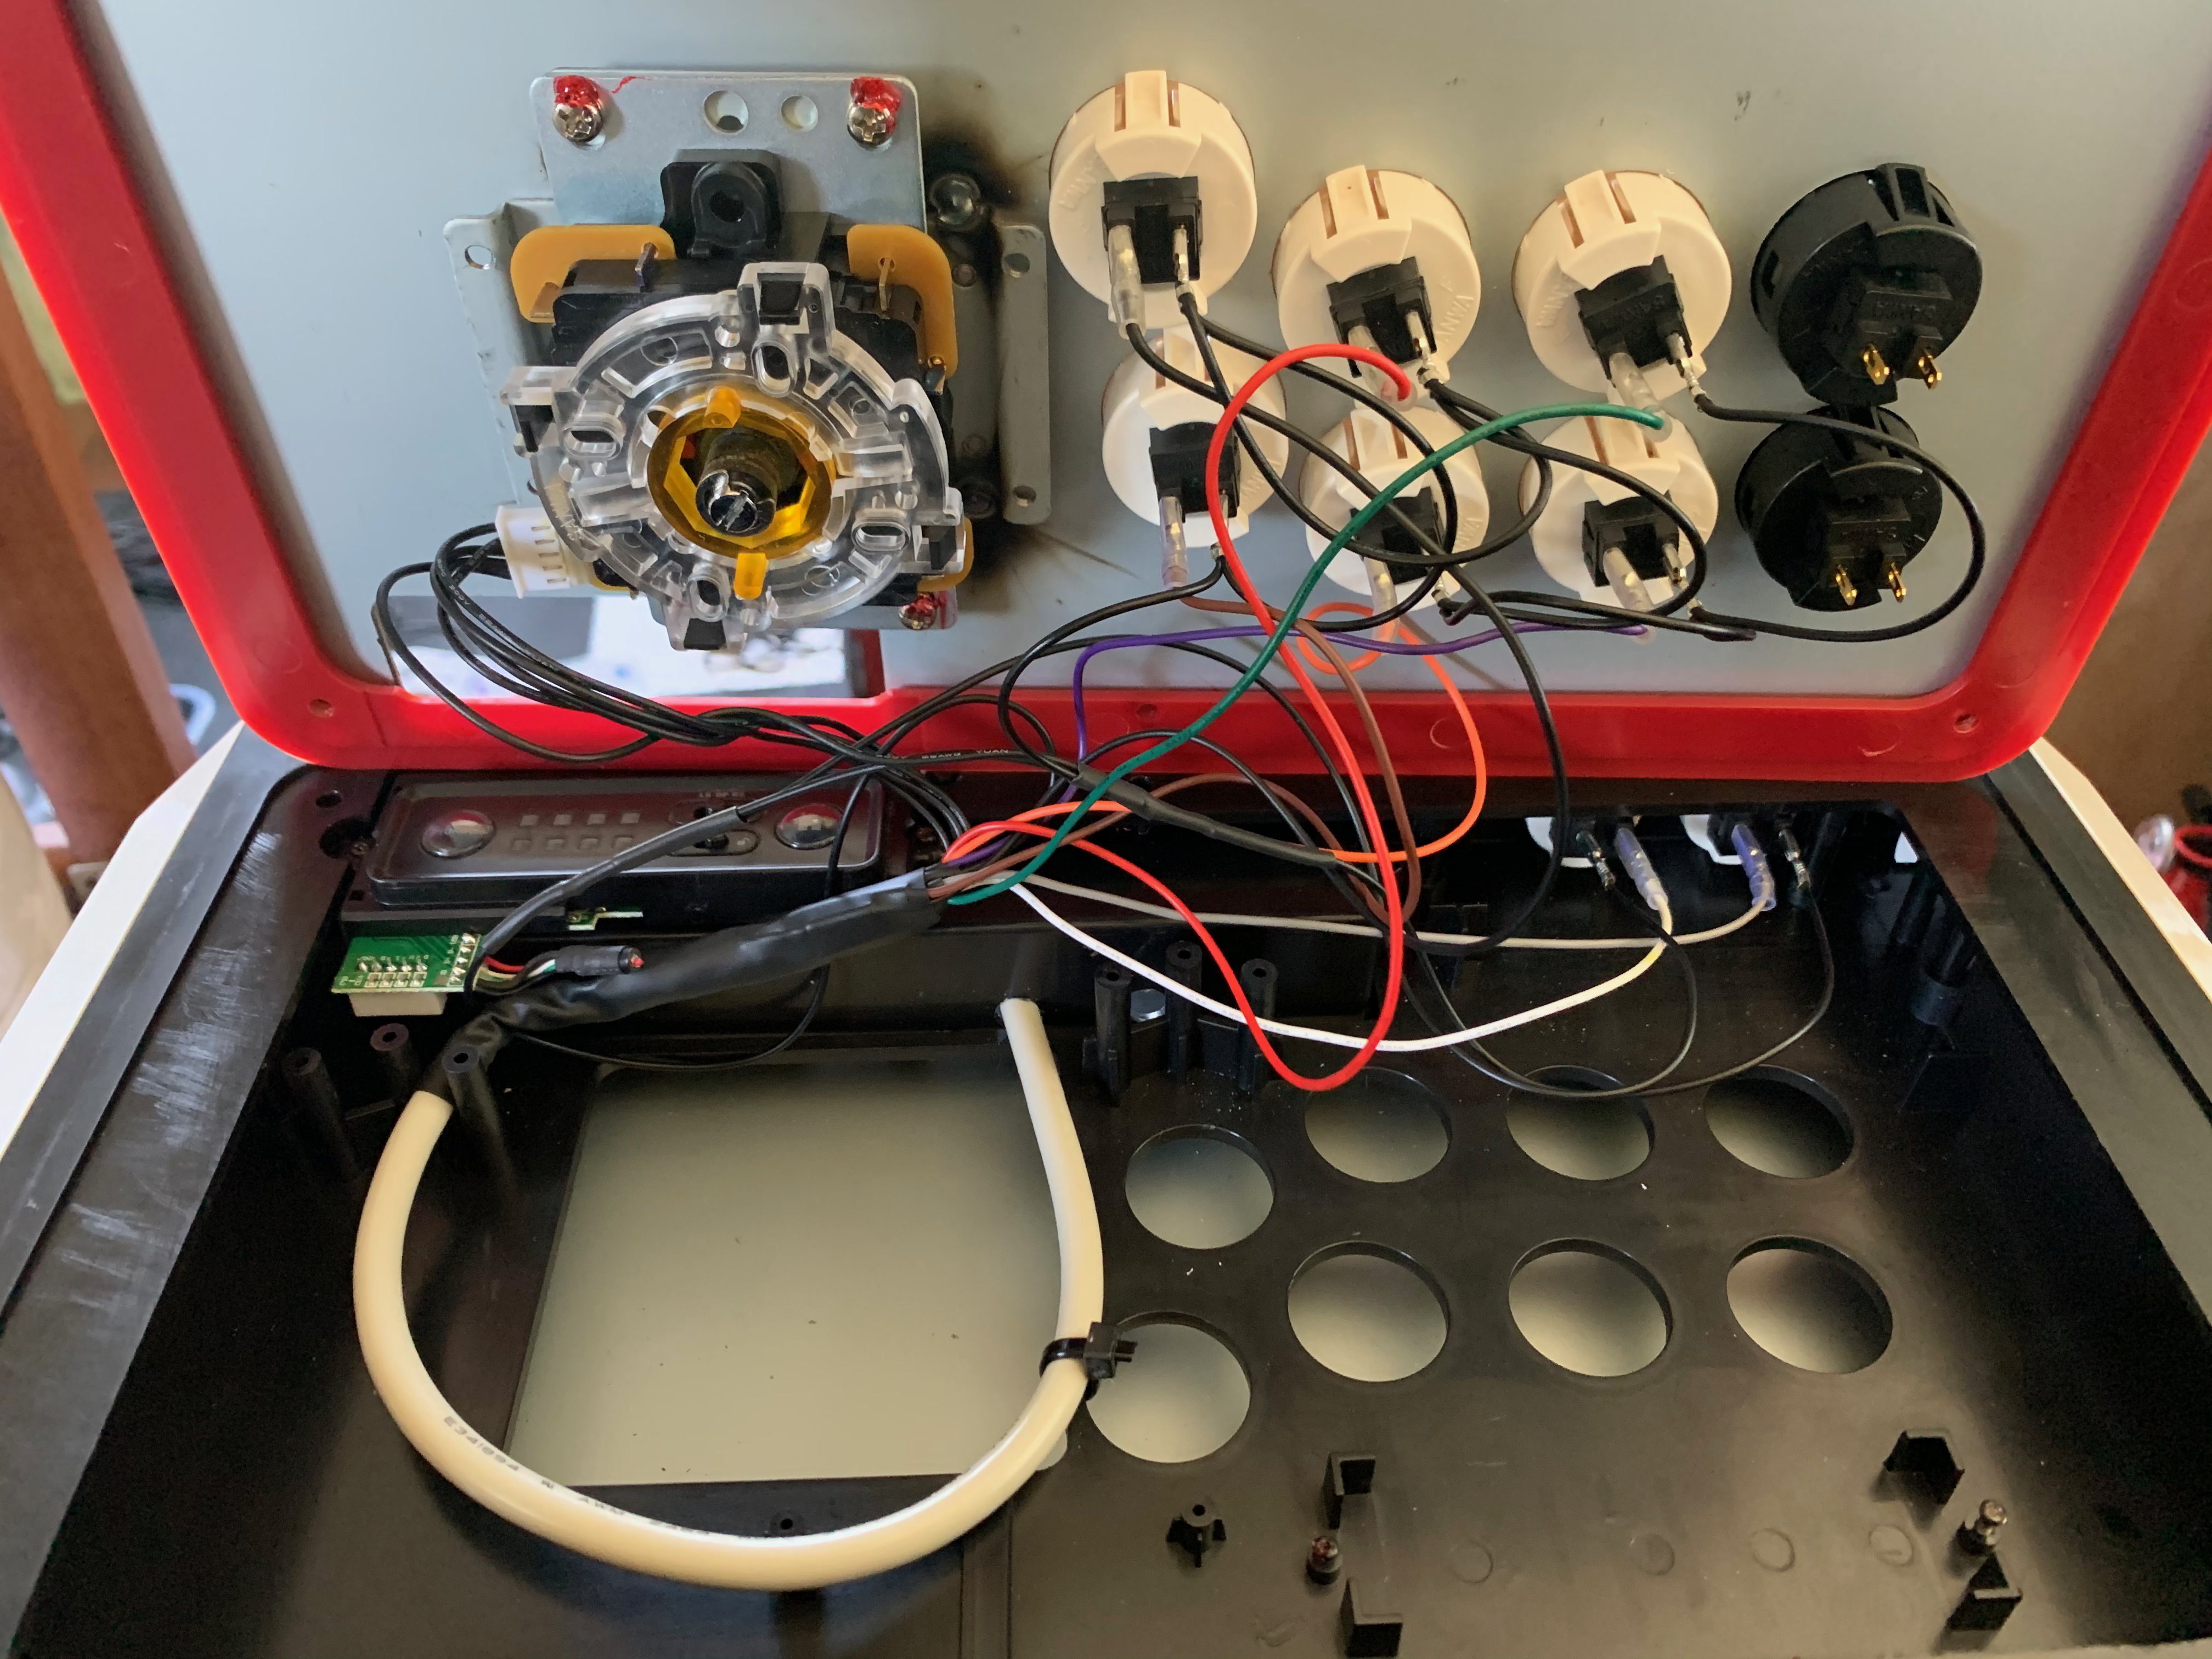
This approach wires every switch exactly as it would be on a 90’s-era arcade cabinet.
Back to the Superbench though, I continued along with the two 4-inch speakers and the coin door. Here’s a shot showing the inside – you can see the power supply and the speaker amp is also now in place.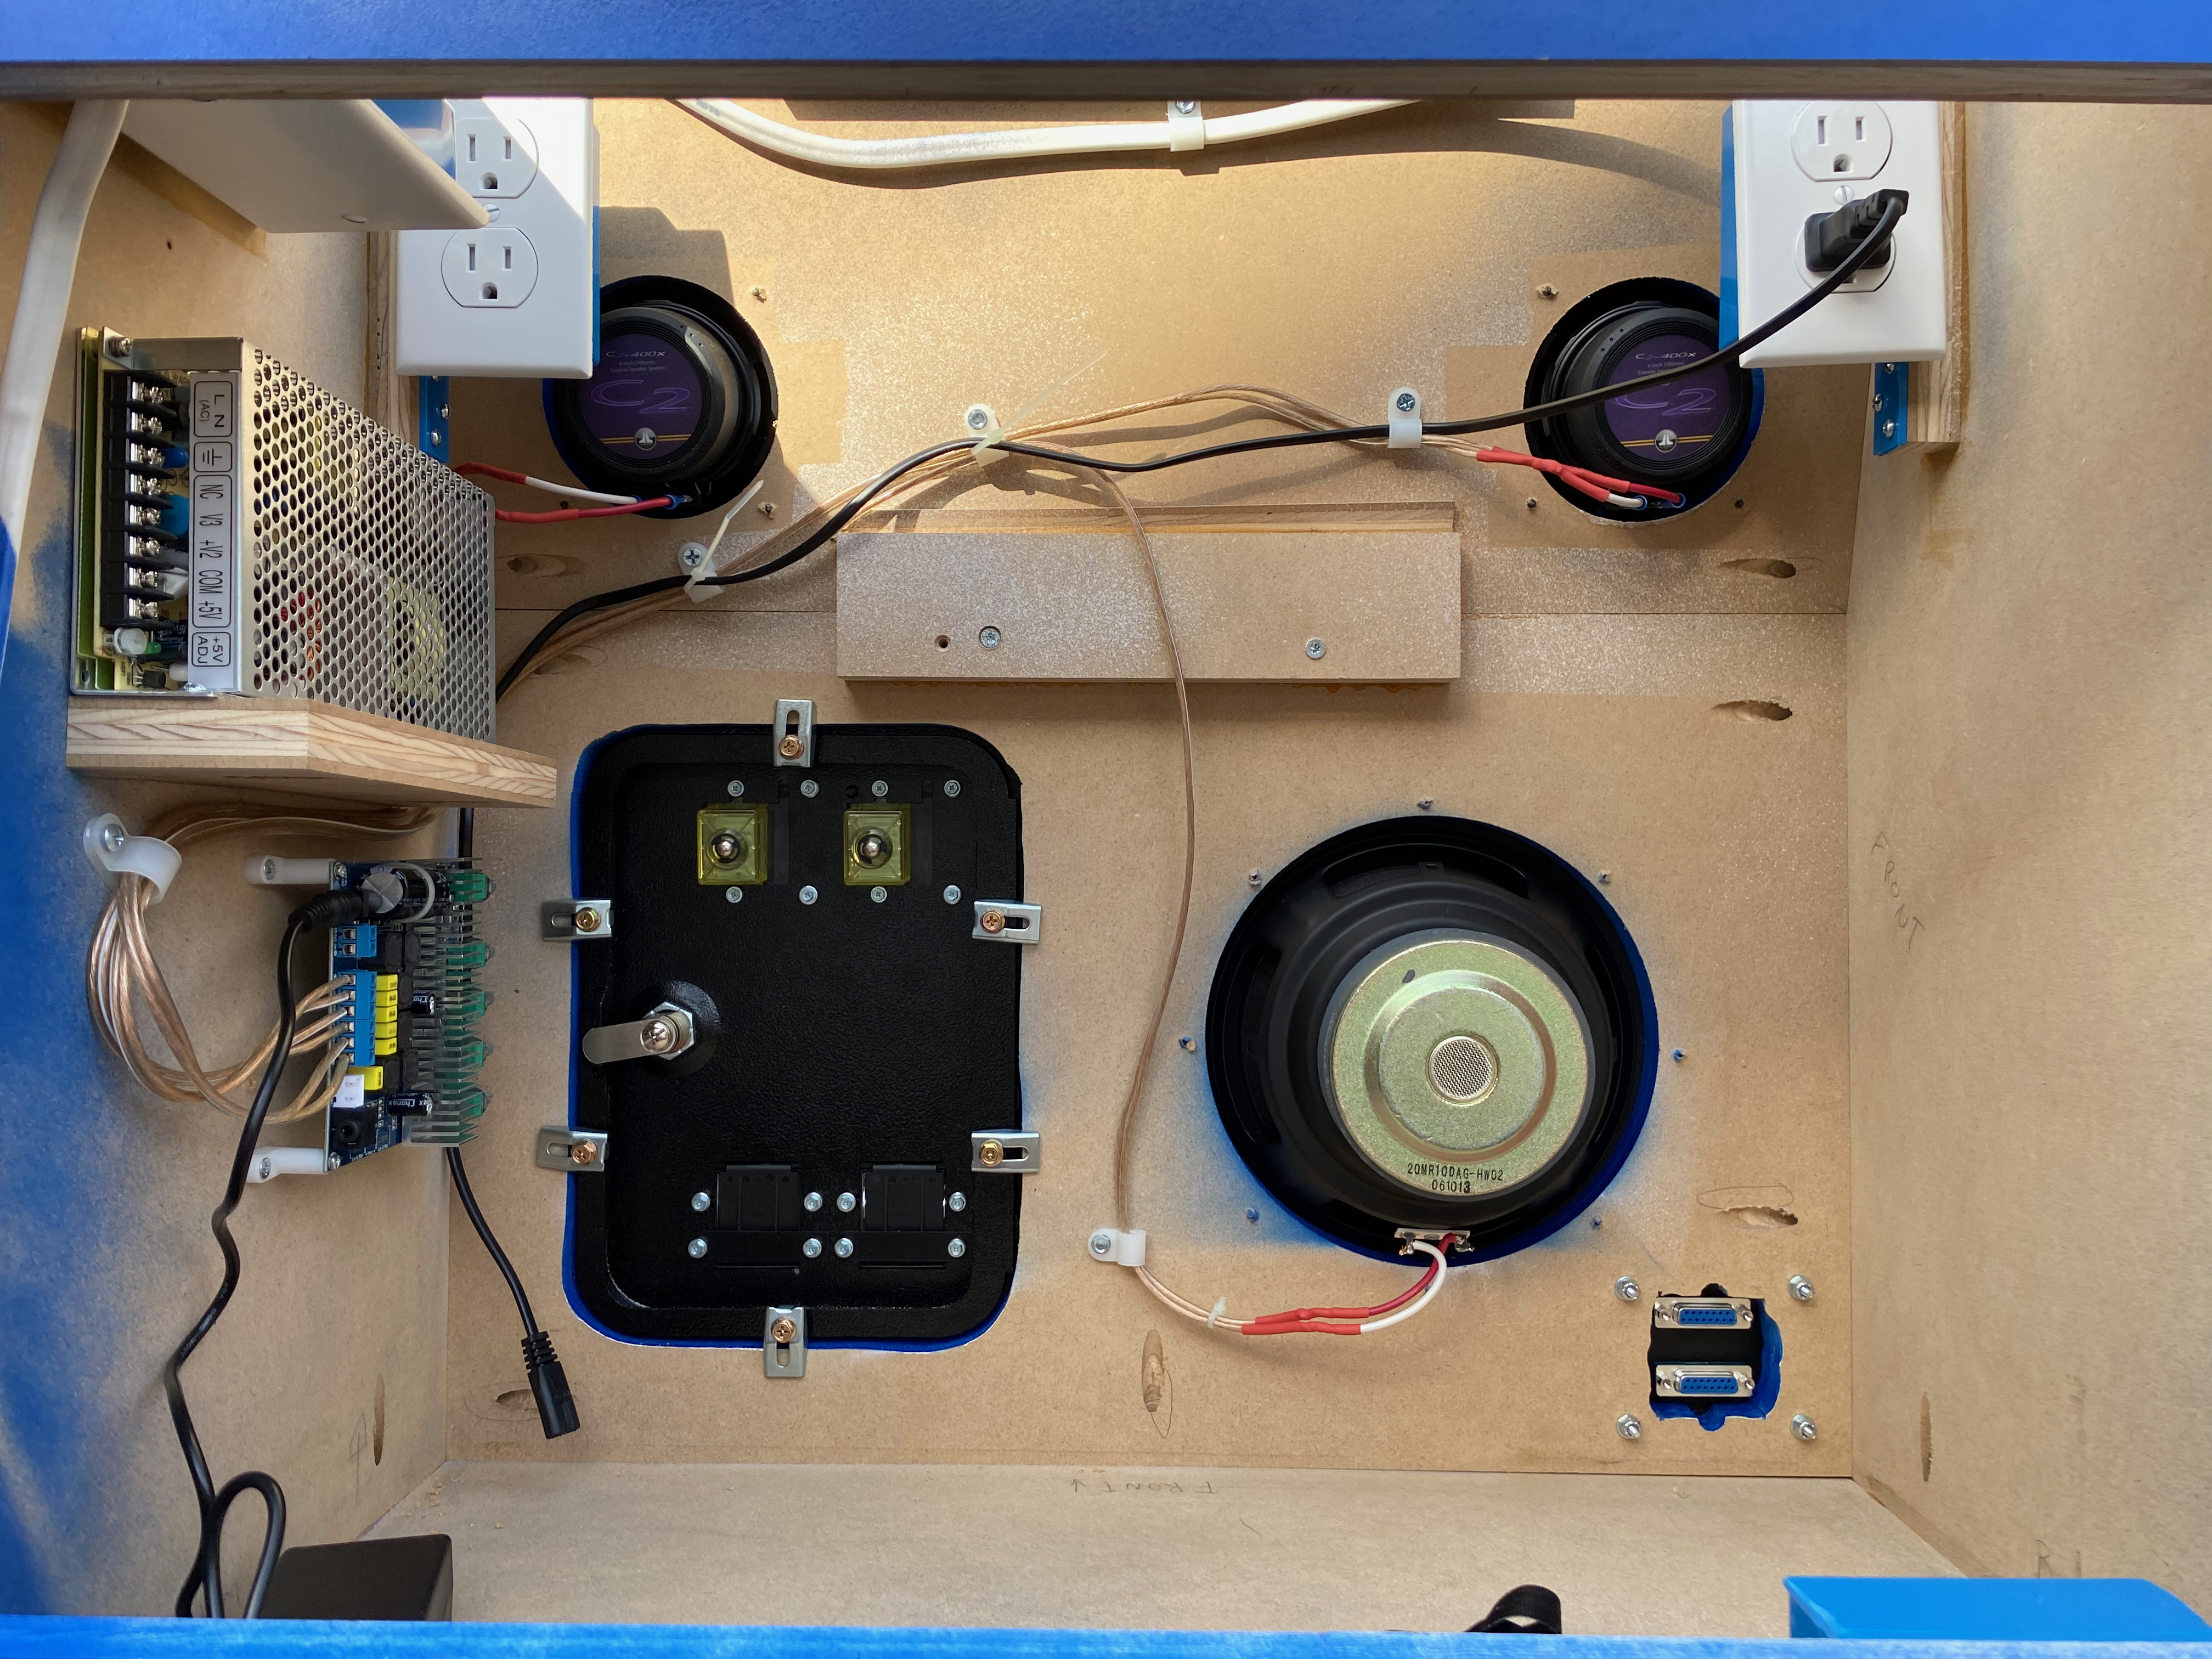
The inside is getting near completion at this point, but there is still one more board to mount – the JROK video encoder I’m using to transform the RGB output from the arcade board to Component Video my TV takes. One of the nice things of this type of video transformation is that it adds zero delay – that’s good because otherwise it would defeat one of the main purposes of playing on a CRT! Here is the right side with all components installed. Note the volume controls are close to the coin door and hence easily accessed from the front of the cabinet.
At this point the front and interior are pretty much done! Still more to do, though – at this point it was safe to install the top panel of the cabinet since no more wiring was needed (as seen below) and the casters on the bottom: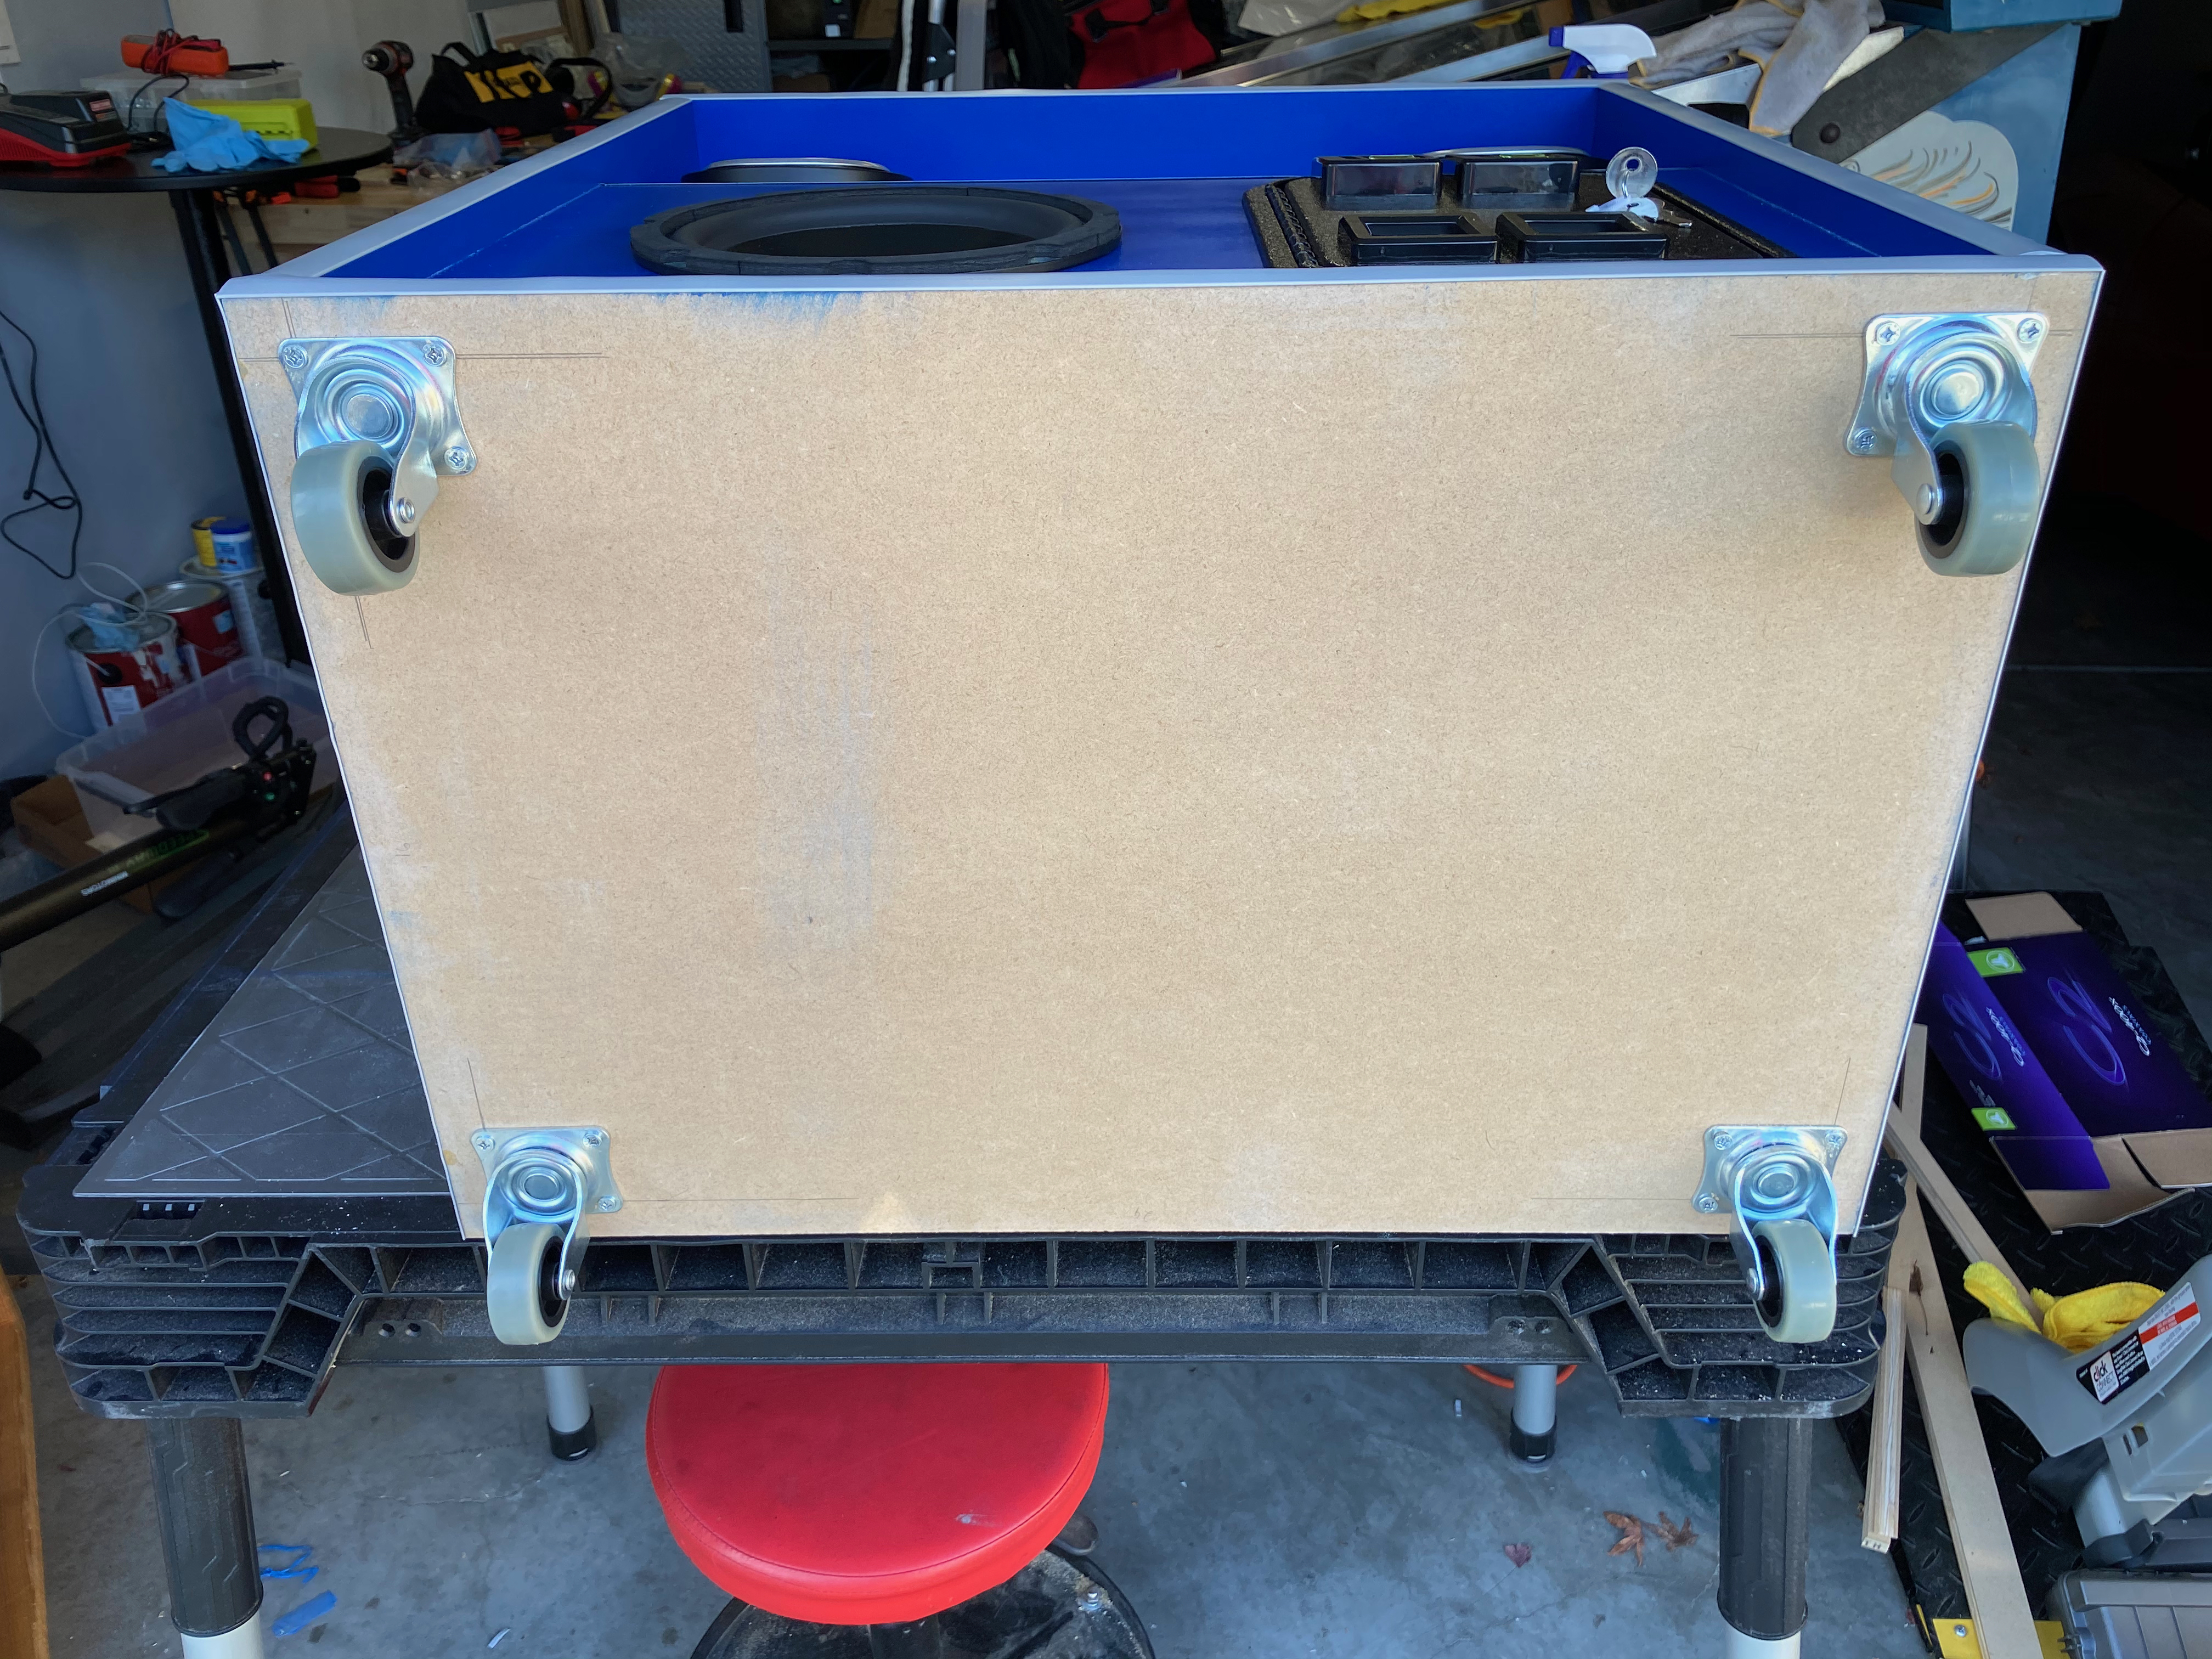
And finally to complete the back, exhaust fans and grills, and a door.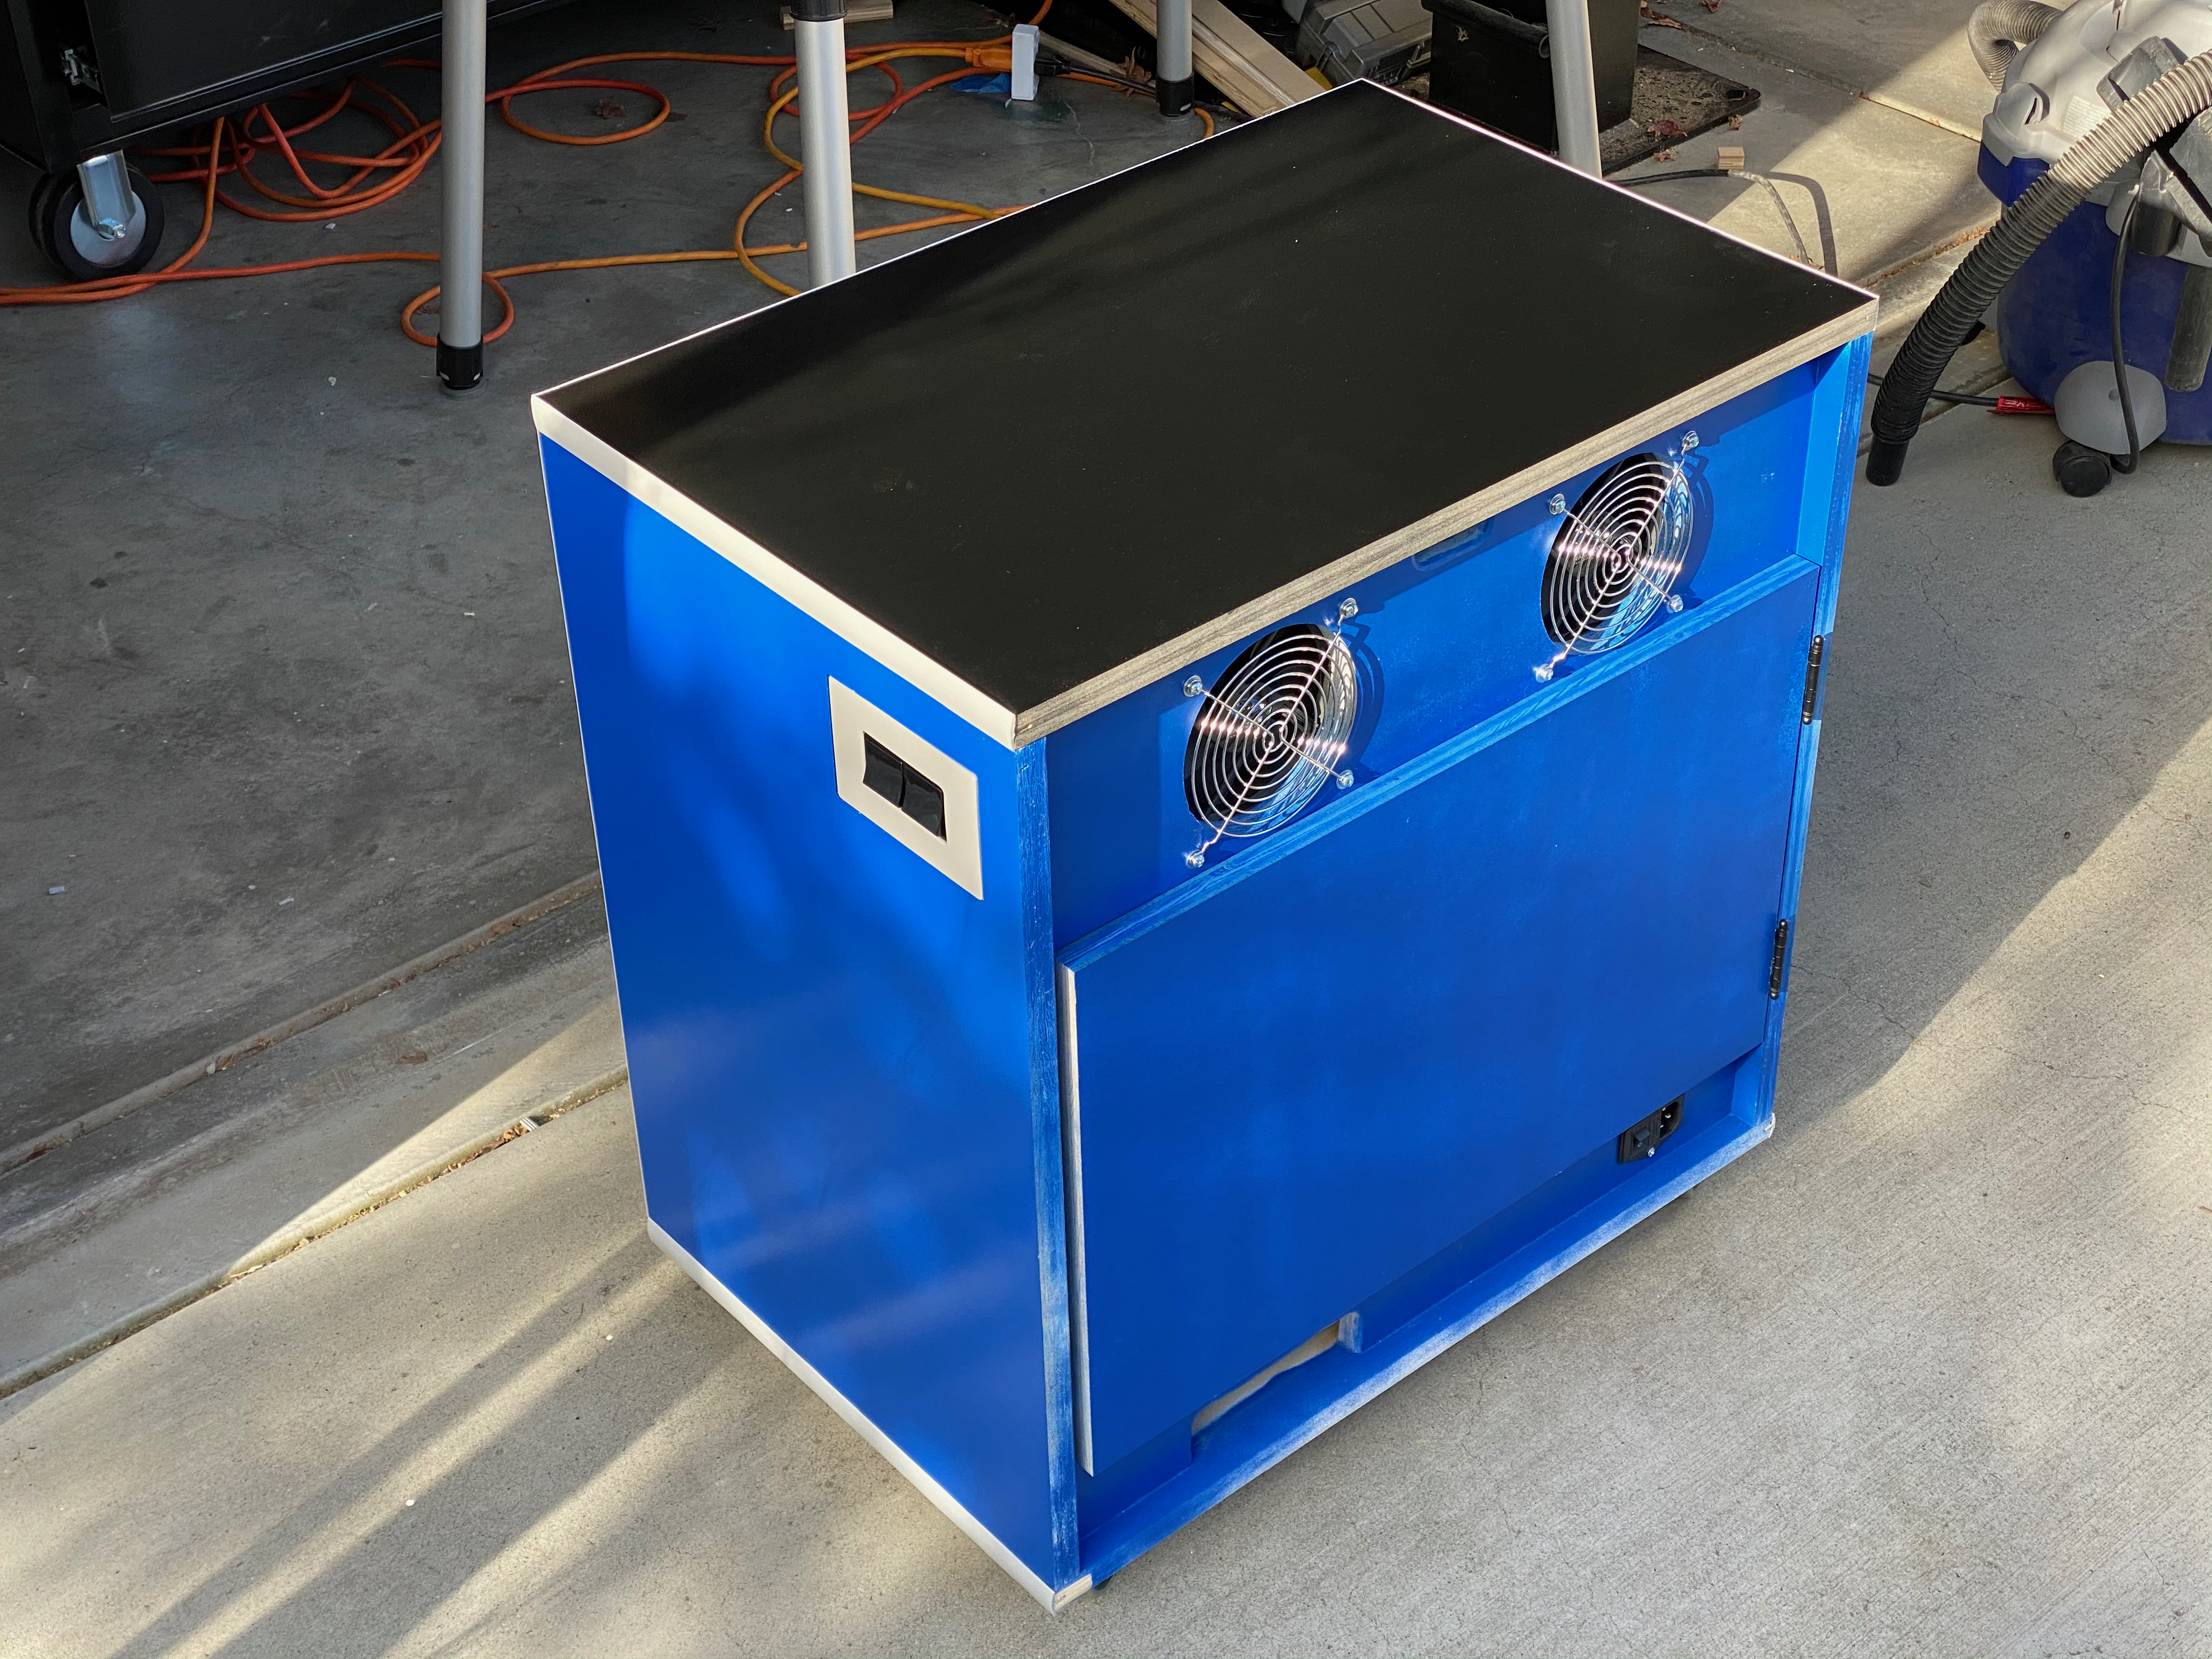
This is also when I installed the T-molding. It was more work than I was expecting to hammer it in, but it turned out pretty good!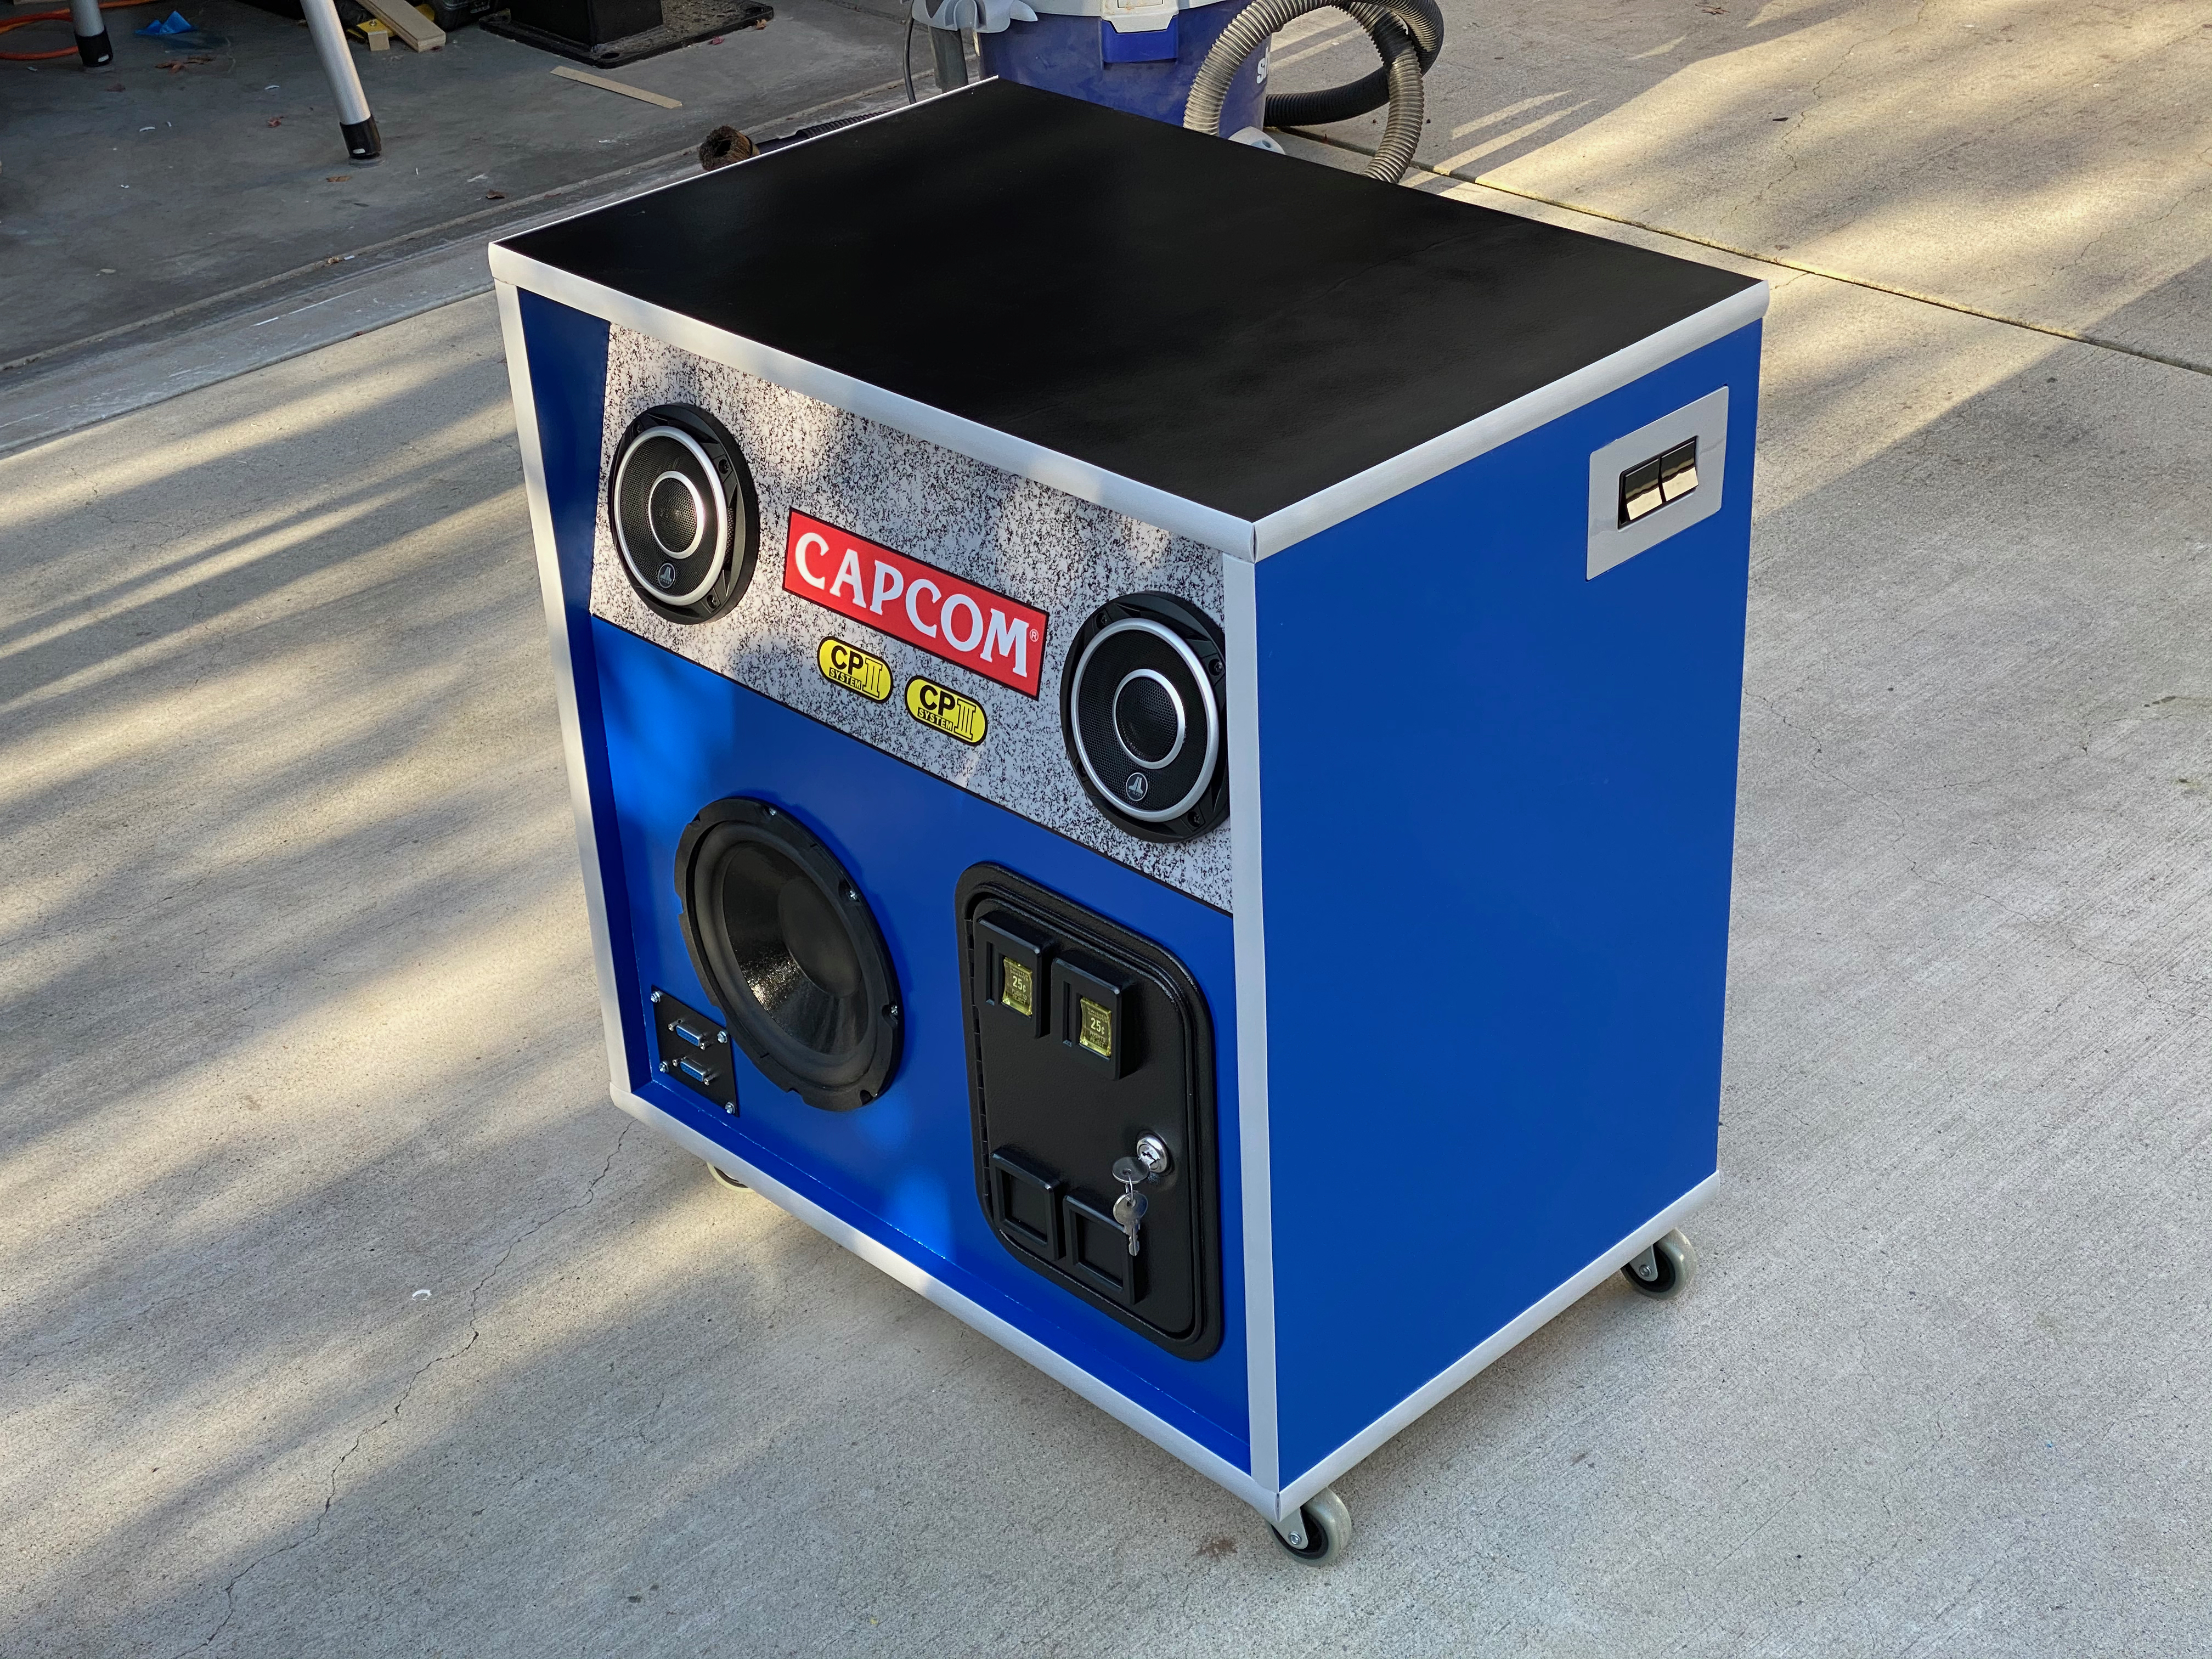
Last but not least the side art! I first put down some tape guides in order to be 100% sure they were centered and level.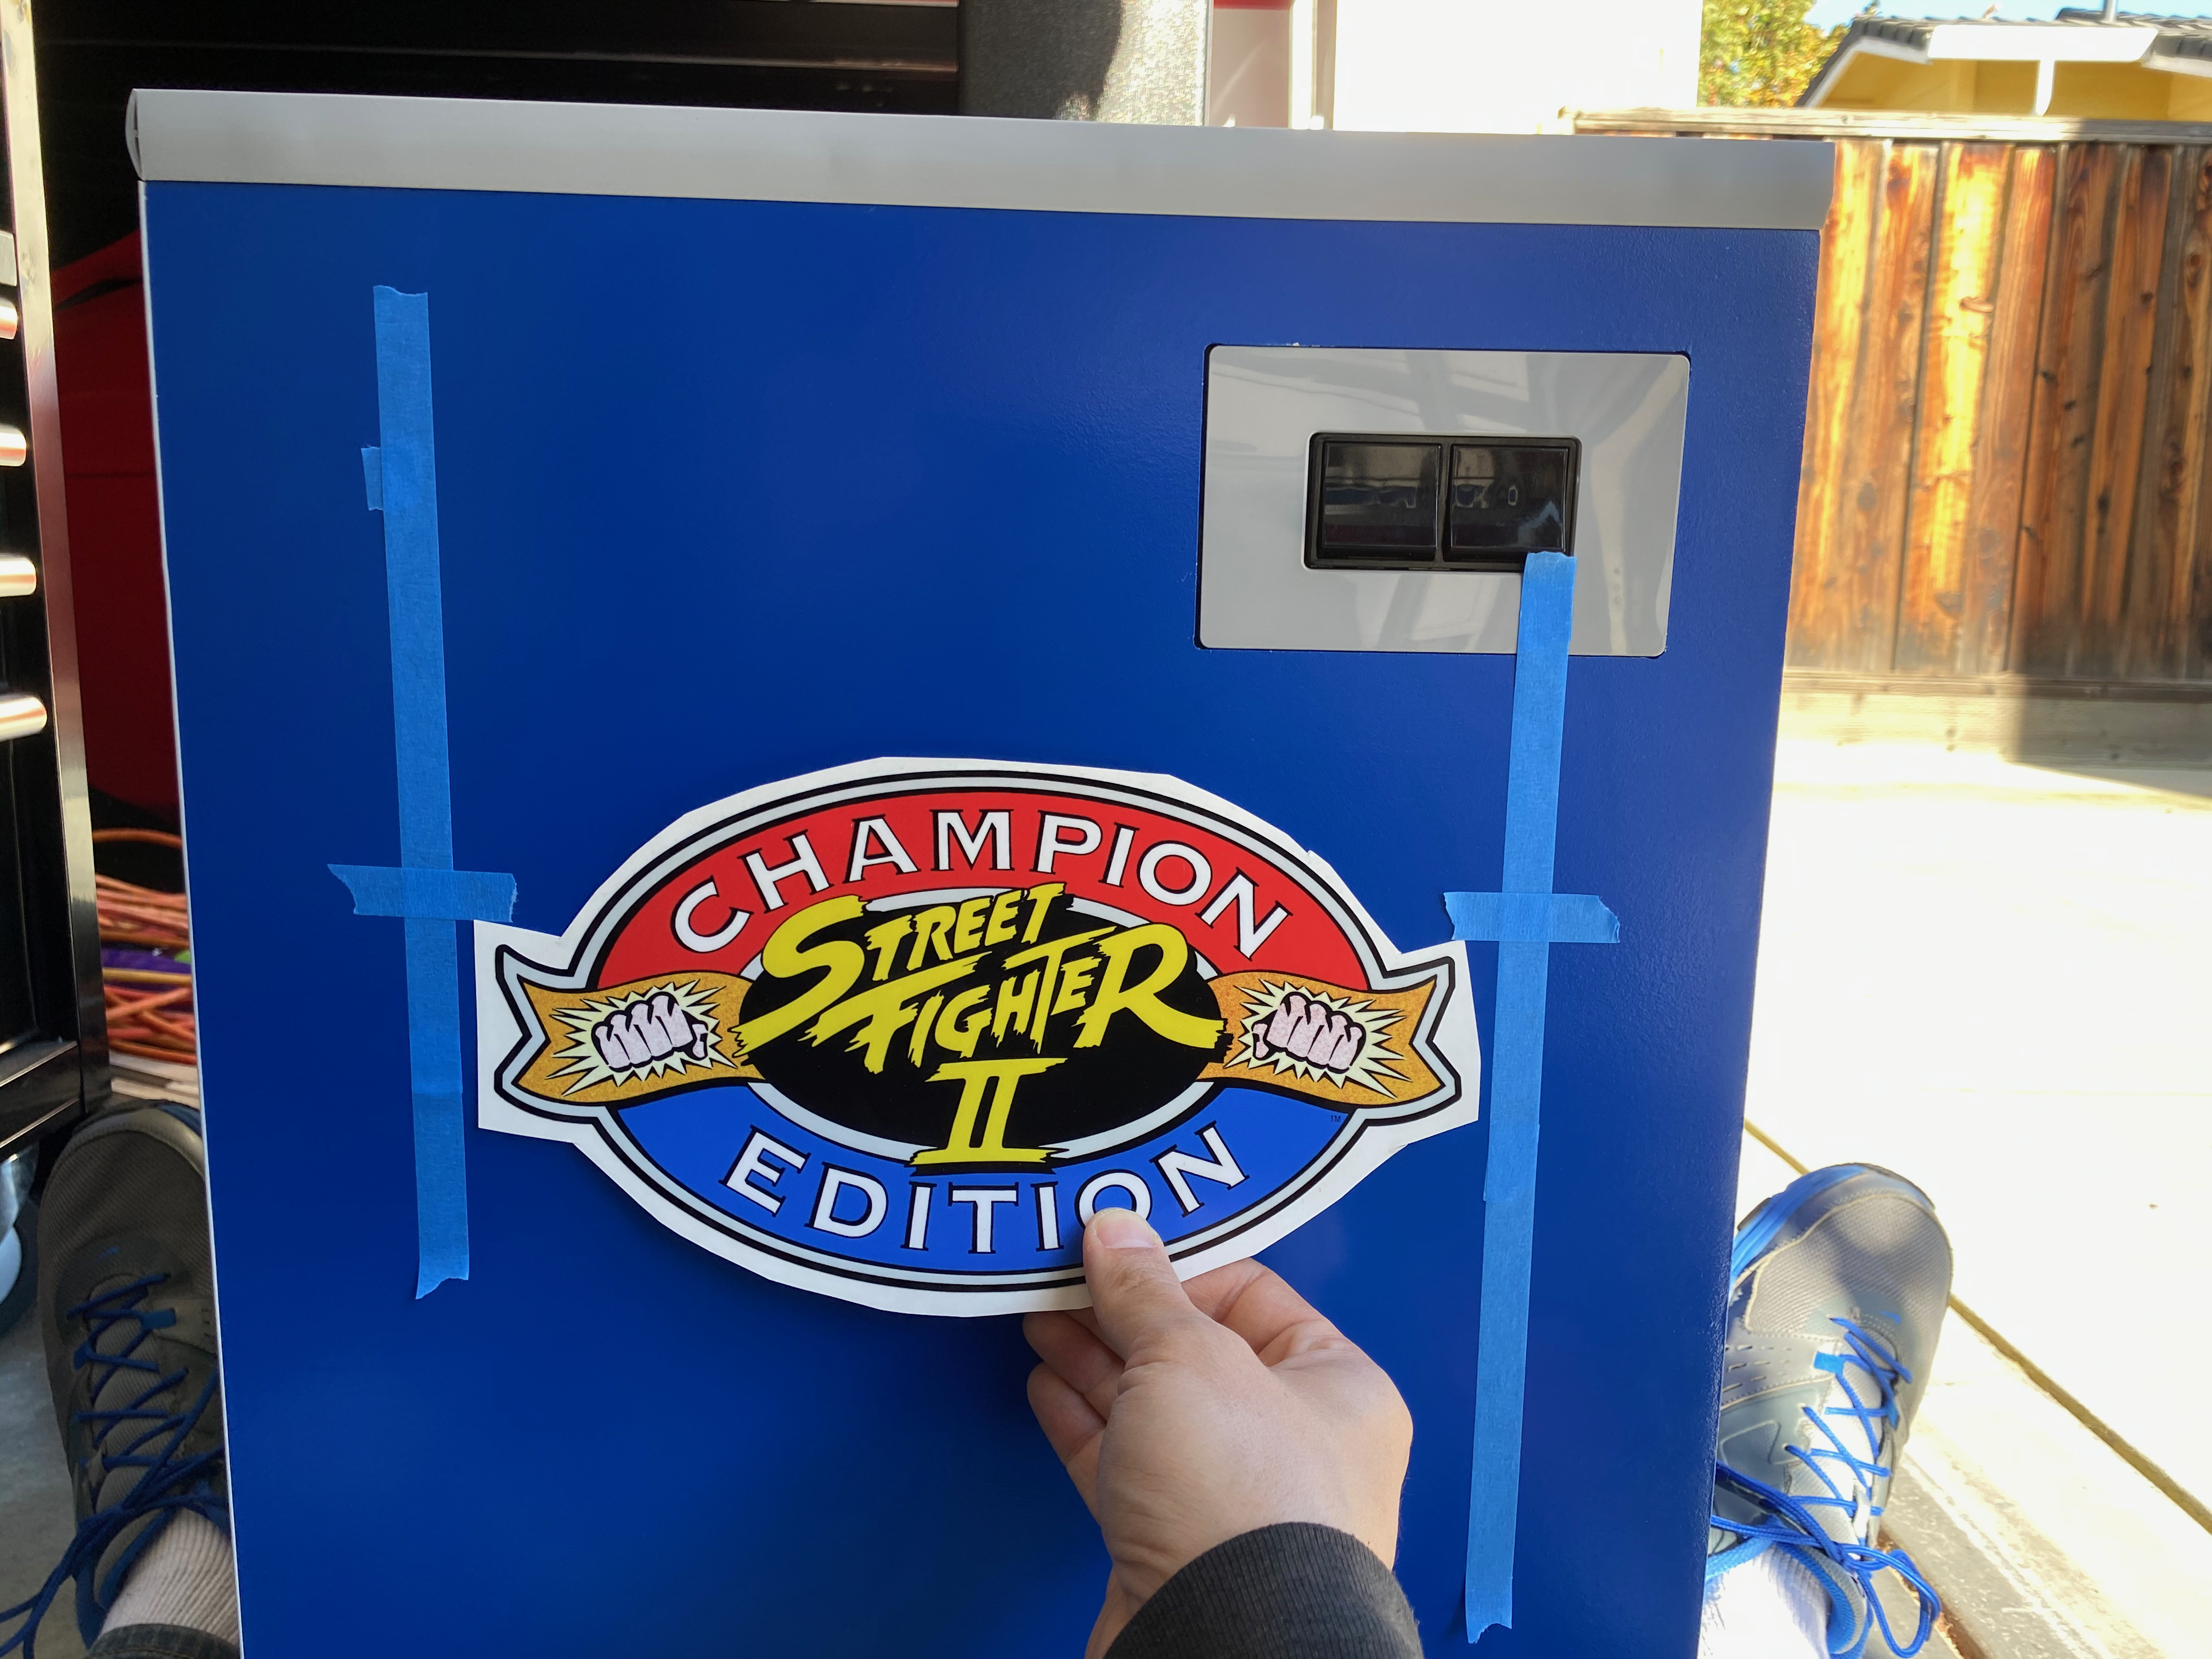
And the final result with a sheet of tempered glass on top!
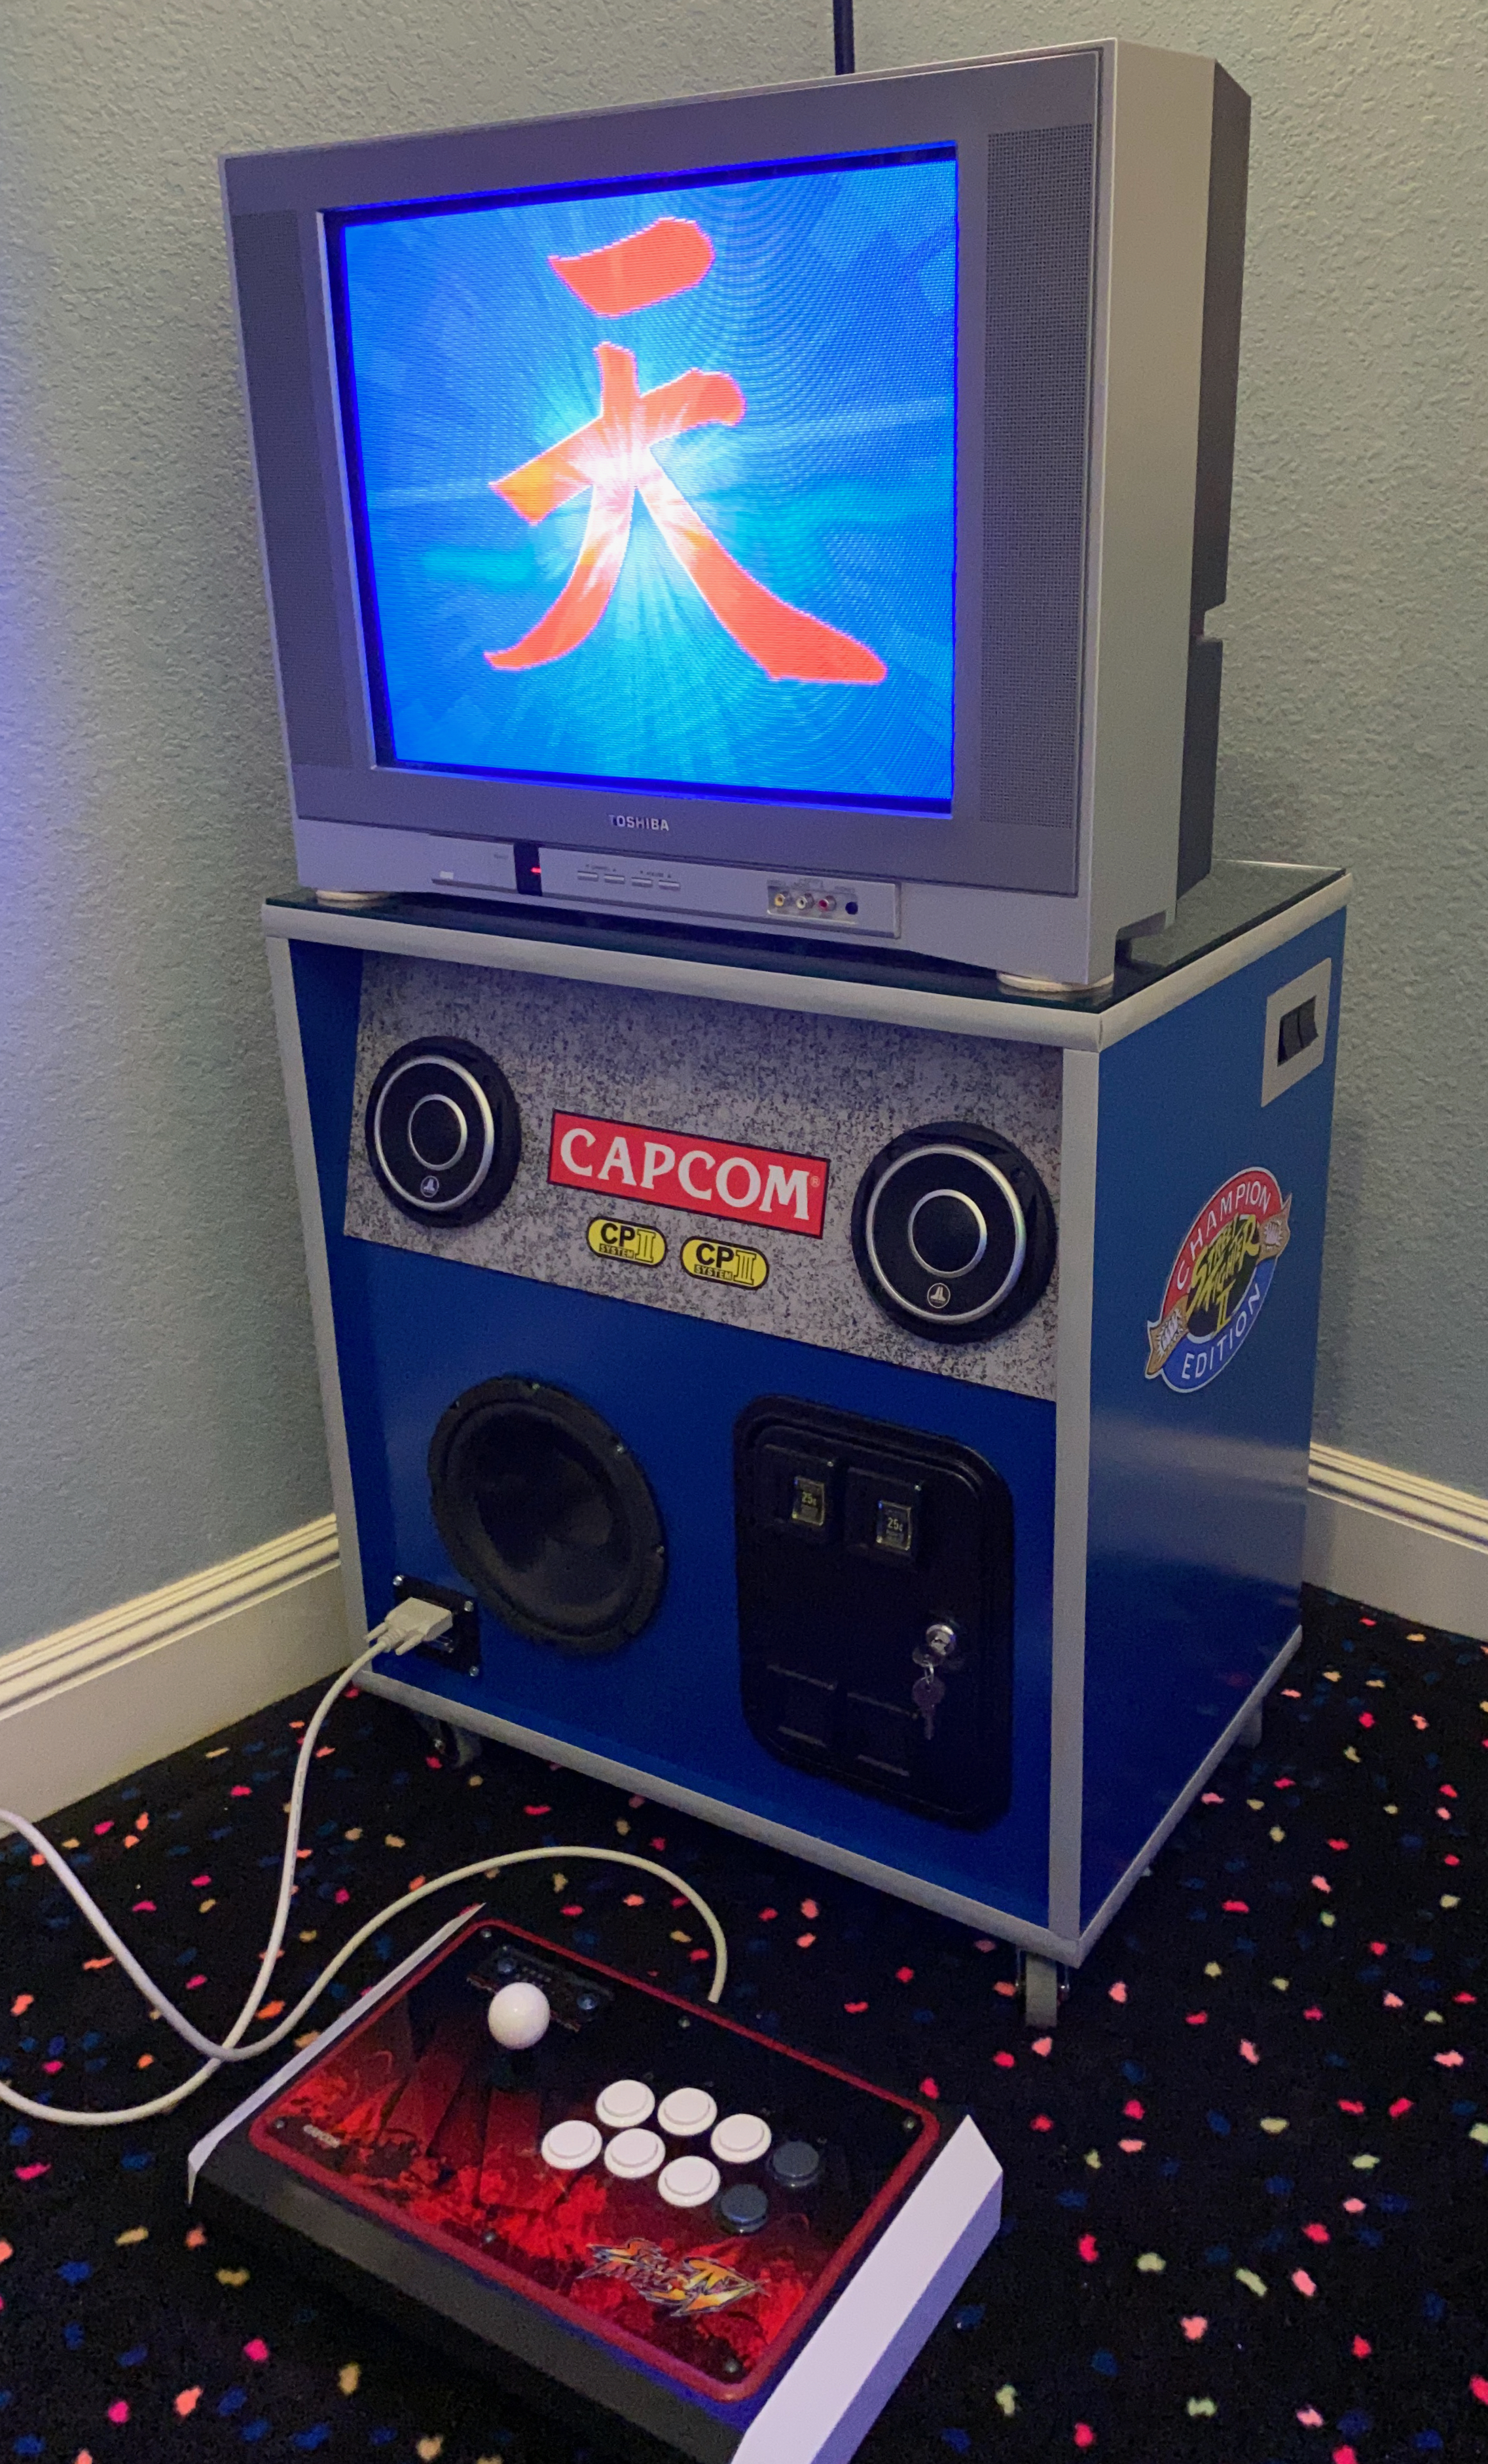
Very happy with the final product. At this point I gave the spray paint a few more days to fully cure before putting a heavy CRT on it, and in the meantime fabricated a vertical mount for my CPS-2 board.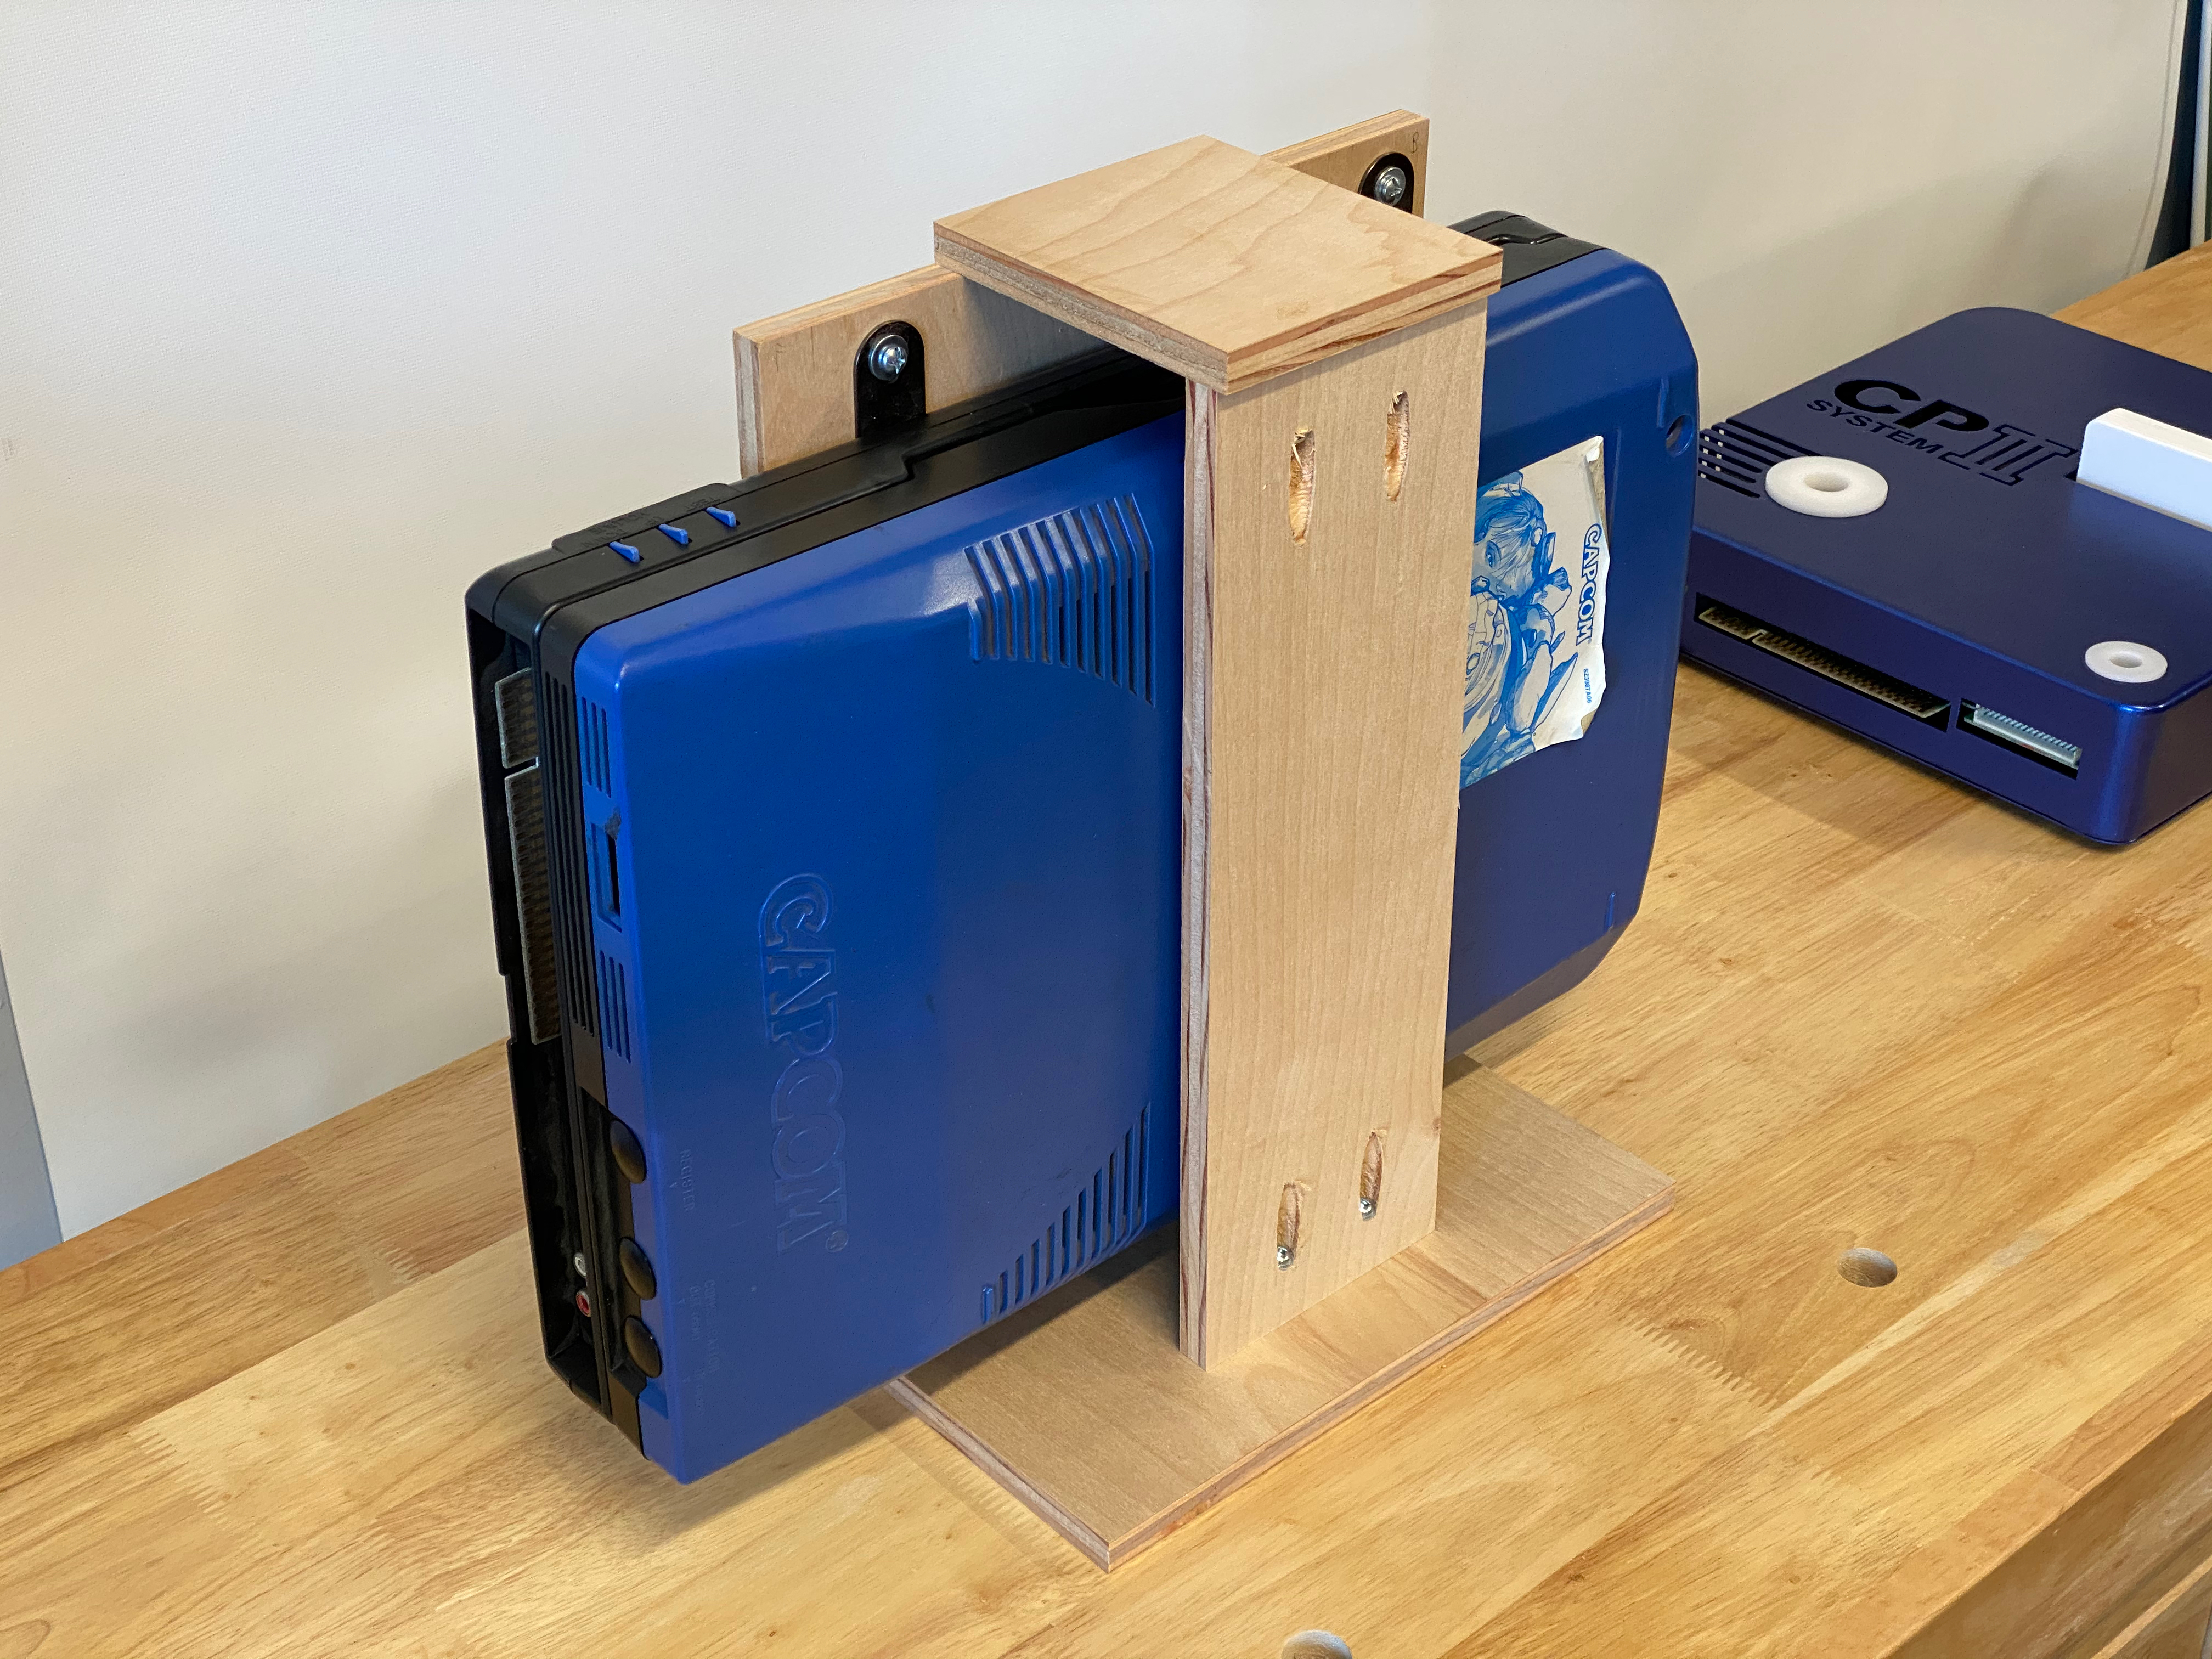
The CPS-3 board can stay horizontal as it’s quite a bit smaller. Finally it was time to get the Superbench into my game room and connect it all together with the JAMMA harness – powered it up and it all works great! An excellent addition to the pinball machines.