
I undertook a new project recently to upgrade my game room to carpet. One of the main reasons, in addition to the great look, was to cut down on the noise – carpet does a much better job of absorbing noise than hardwood.
So, what carpet to get? I didn’t want to use just “plain” carpet – much too boring! I found a manufacturer, Joy Carpets, that specializes in just the right styles for game rooms – their “Neon Lights” line. The next question I had to answer was exactly what to get an how to lay it down on the floor. I wanted the wall-to-wall look, but without nailing it down to the floor which would damage the nice hardwood underneath. The manufacturer put me in touch with a local distributor, French Brothers Flooring America, which was able to custom-order me a rug made with that carpet but sized exactly to my dimensions! I measured up the room, took off an inch (to account for the room likely not being perfectly square, and sent off my order. A couple weeks later it had arrived (along with a grip mat to lay underneath) and I was off to pick it up.
It took me quite a while to get all the games out of the game room, of course, but I then laid it out and it was just what I was hoping for! It looks great and really gives the feeling of wall-to-wall carpet without the permanent installation. Note the ugly un-covered inch by the right wall will be behind the machines and not visible at the end of the day.

Hoping to cut down on the echoing/noise in the game room even further, I took the opportunity of the room being empty to install some foam panels on the wall. They are the cheap 1″ deep ones, certainly not professional grade, but better than nothing and not pricey.

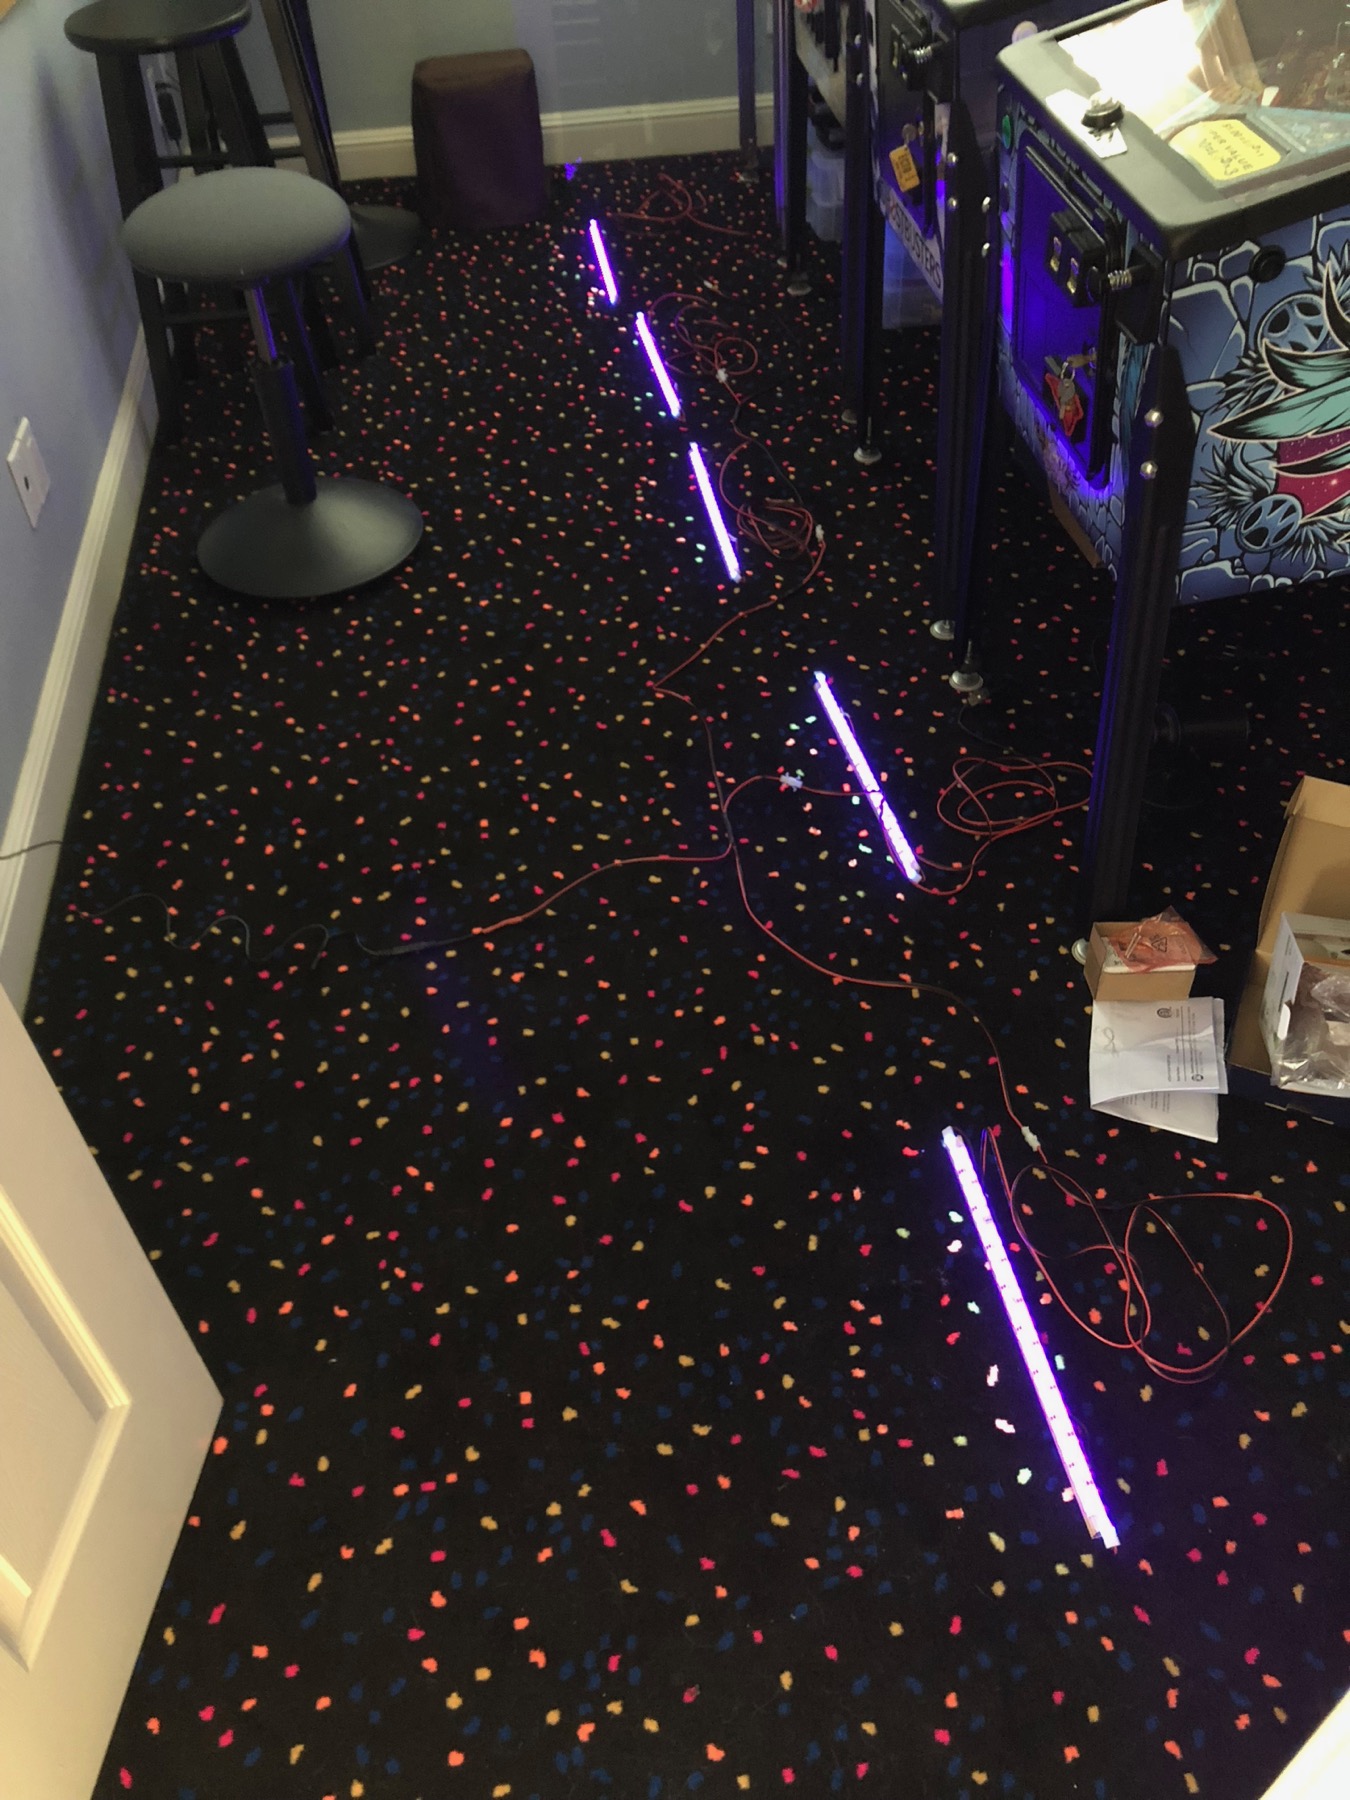
Of course that’s not the end of this project! One of the cool things about the carpet is that the colored dots are UV (black light) reflective. I thought of installing black lights high up in the room, but I really don’t like the idea of staring into UV LEDs/tubes, so I decided instead to mount the lights underneath the games, but pointed down at the carpet. I bought an 8 foot long piece of pine trim at Lowe’s to fabricate light strips – I made five total, one for each game. Each strip has two black light LED strips each plus wiring long enough to reach the back of the machines.

I then fabricated a daisy-chaining wiring harness to connect all five strips to one power supply. Here are all the strips being tested on the wiring harness for the first time:
Finally, I attached the light strips under the games. I didn’t want to make any permanent modifications to the games, of course, and want to be able to easily transfer the lights to a new game if I sell one and get another, so I used 3M damage-free hanging strips to attach these to the games, as well as wire hangers (not seen here) to run the wires to the back of the games.
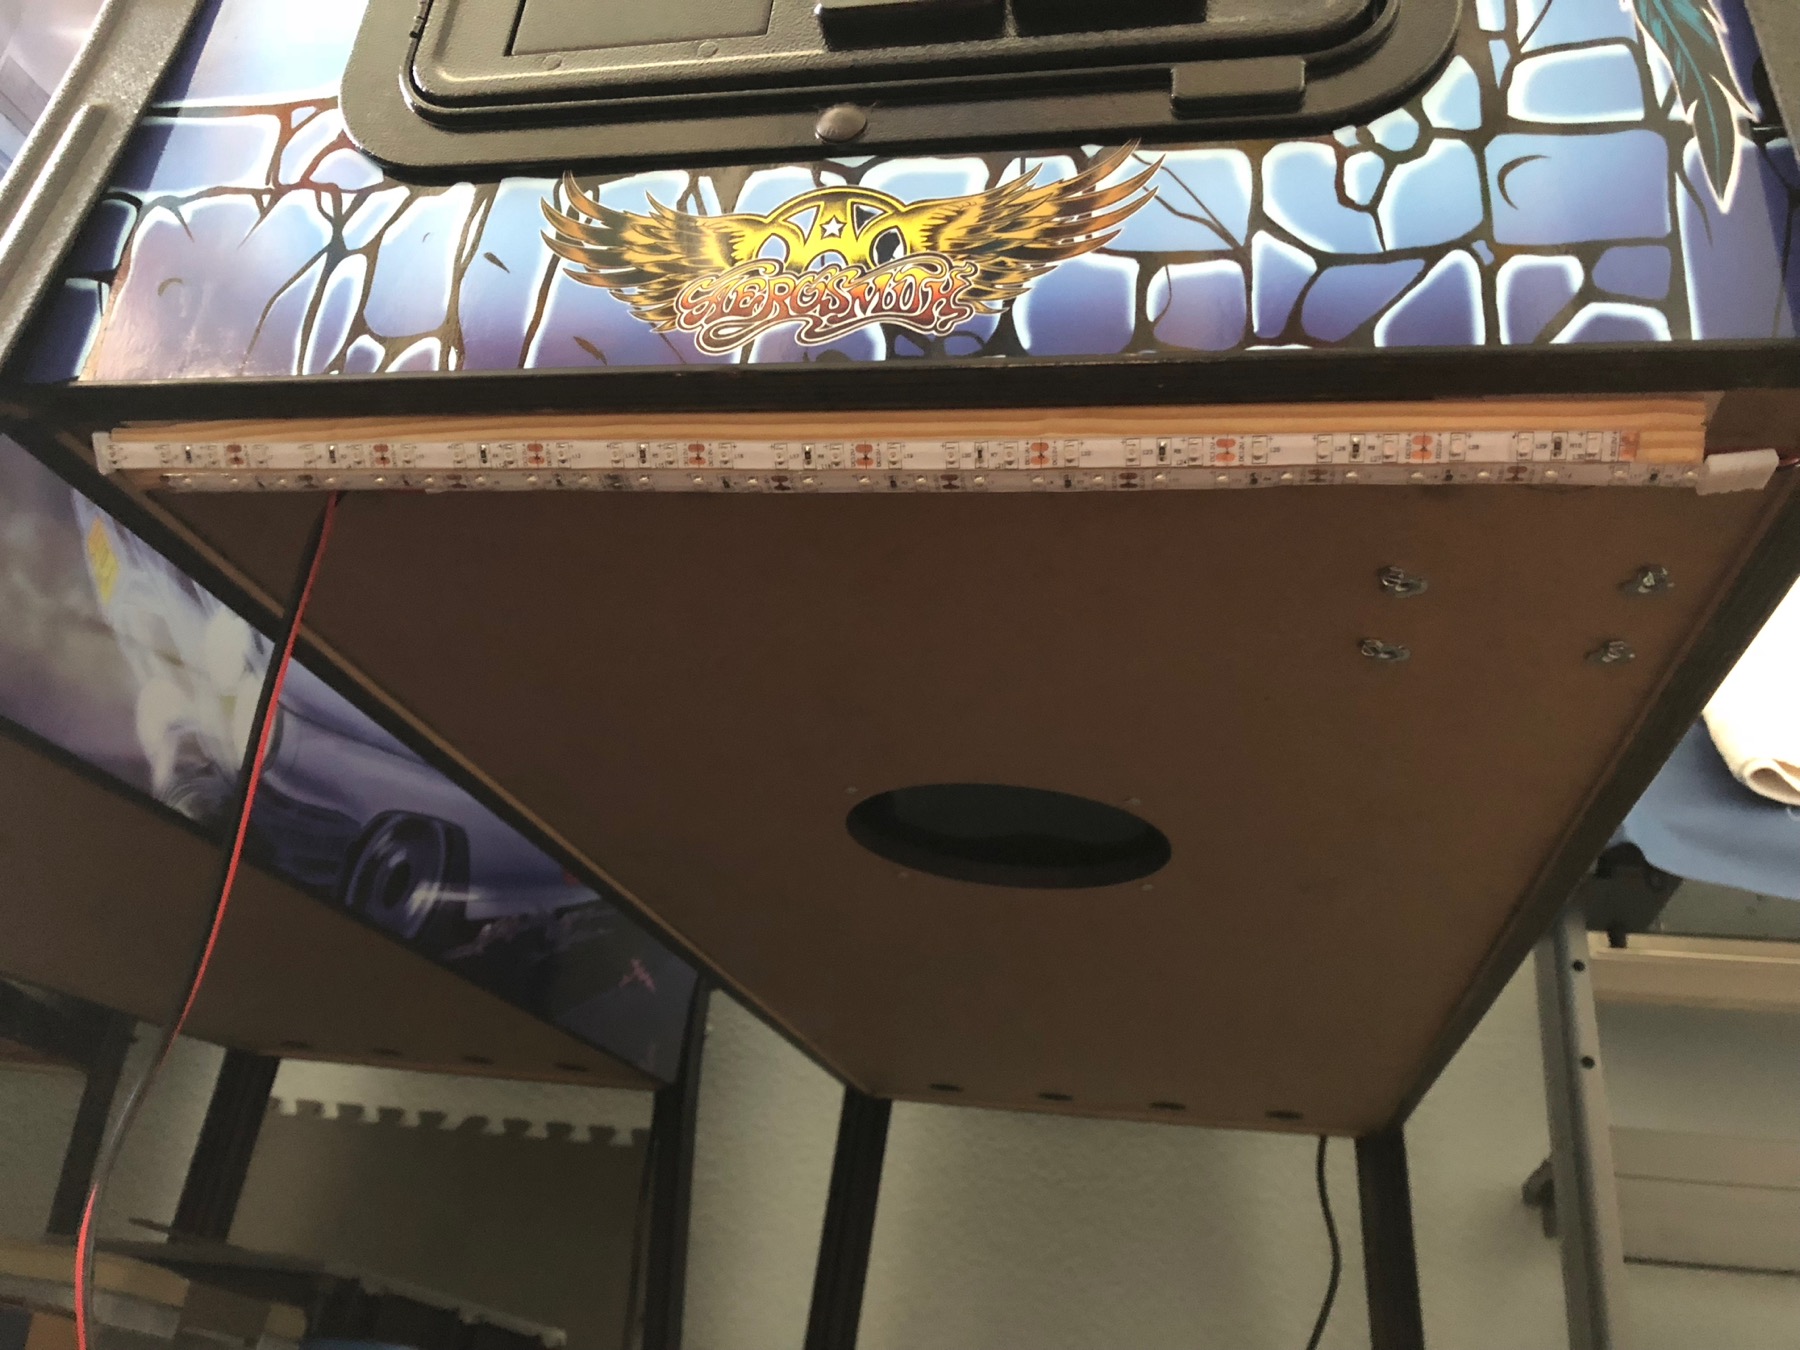
The light bars are designed to have one strip of LEDs pointed straight down, and the other pointed down towards your feet at a 45 degree angle.

They work great and light up the carpet fabulously! So in the end, not only does the room look amazing, it’s quite a bit quieter too and the games sound better with less echoing!
