Upgraded Space Shuttle Pinball Flippers

Flippers are one of the most important part of any pinball machine – if the flippers aren’t strong and snappy, no one will enjoy playing the game. Over the years, Williams improved the design of the flippers. While I’m rebuilding them on this older design – relatively speaking of course,  Williams was making pinballs decades before Space Shuttle – I figured why not take advantage of those enhancements?

The first upgrade I did was swapping out the original series-wound coils for parallel-wound ones. This allows for the addition of a capacitor to the flipper circuit, which prevents sparking and keeps the EOS switch working better longer.

Secondly, I swapped out the flipper return springs for the newer external-style ones. These don’t bind up like the old-style ones and should be more reliable and durable.

Finally, I rotated the coils 180 degrees to keep the lugs away from the coil stop. Unfortunately the wires were too short on one of the flippers and I had to run a couple small extensions, but it was well worth it to keep the lugs away from the coil stop, which is subject to extreme vibration.

The end result is a combination of System 11 and WPC flipper technology on my System 9 game!

flippers-1

flippers-2

Posted in Space Shuttle | Tagged , , , , , , , | Leave a comment

Started Space Shuttle Cabinet Reassembly

I finished cleaning up the coin door, similar to how I did the side rails a while back. Nothing particularly interesting to report other than it took quite a bit of elbow grease, and that purple scotchbrite pads worked much better for me than sandpaper.

With that done, it was now time to start re-assembly of the cabinet. Today I reinstalled the rear glass channel, the side rails, and the coin door/lockdown bar assemblies. When reassembling everything, it was very useful to refer to the photos I took before disassembly, particularly when it came to routing the grounding braid. Pretty straightforward, though, and as you would expect just the reverse of disassembly.

I also installed metal leg protectors and have a brand new set of legs to install when it comes time. The only pieces missing below are the coin entry plates which I will replace as the originals were cracked. Should look nice!

spaceshuttle-cabinet-reassembly

Posted in Space Shuttle | Tagged , , , , , | Leave a comment

Transferred Space Shuttle Pinball Wiring Harness From Old to New Playfield

I worked some more on the Space Shuttle playfield swap this weekend and reached another milestone! The playfield wiring harnesses have been transferred over from the old playfield to the new one.

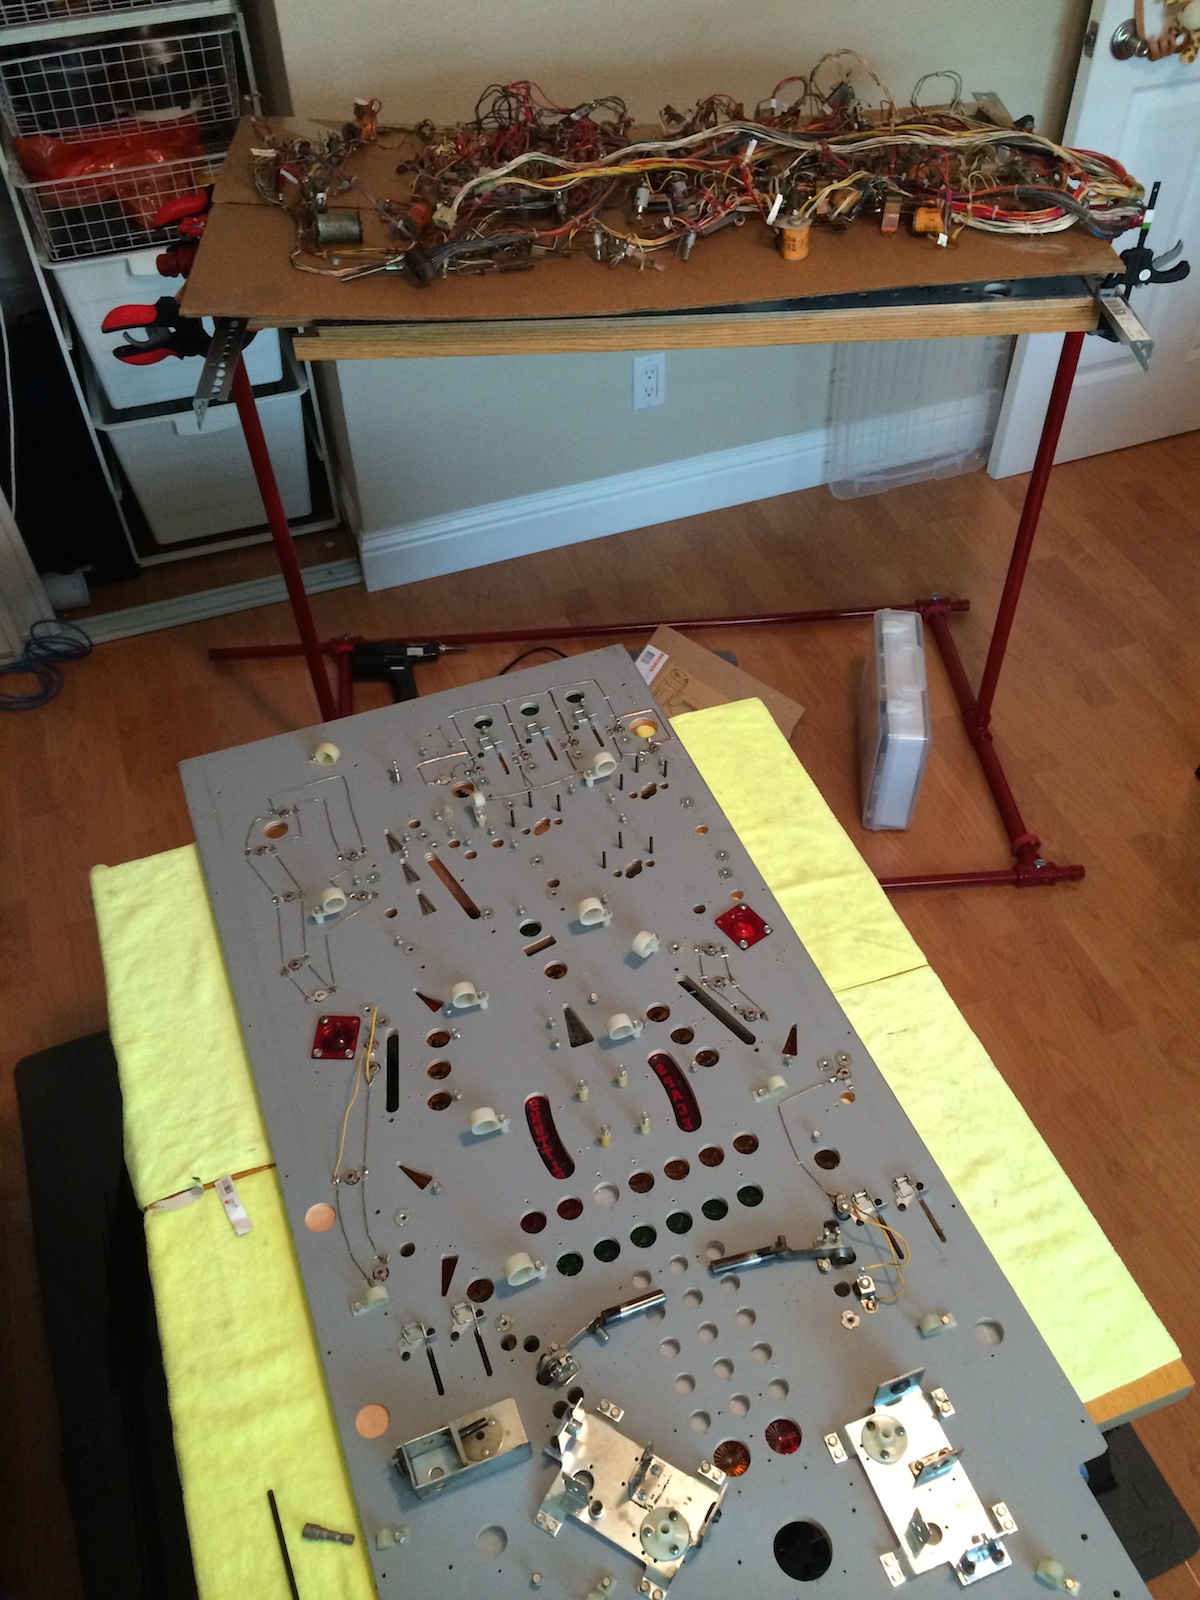
First, in preparation for the transfer, I finally made it all the way to the bottom of both the old and new playfields. It took several work sessions to finish disassembling the old one and pre-drill all the pilot holes on the new one. Some of the major assembly brackets such as the flippers and half of the kickers are also installed. Here’s what the new playfield looked like when it was ready to accept the wiring harnesses:

TransferredWiringHarness-1

I left out the taller brackets and didn’t pre-drill the ones that need to be positioned with the coils in place, such as the kicker and eject shield coil brackets. The plunger for these coils has to be aligned just right for smooth operation, so I’m waiting until everything can be on the new playfield before positioning the brackets, drilling the holes, and installing them. As for the taller brackets, I pre-drilled the ones I could (drop targets, ball save shield) but they are not installed yet because they would be in the way when transferring the wiring harnesses, as you will see below.

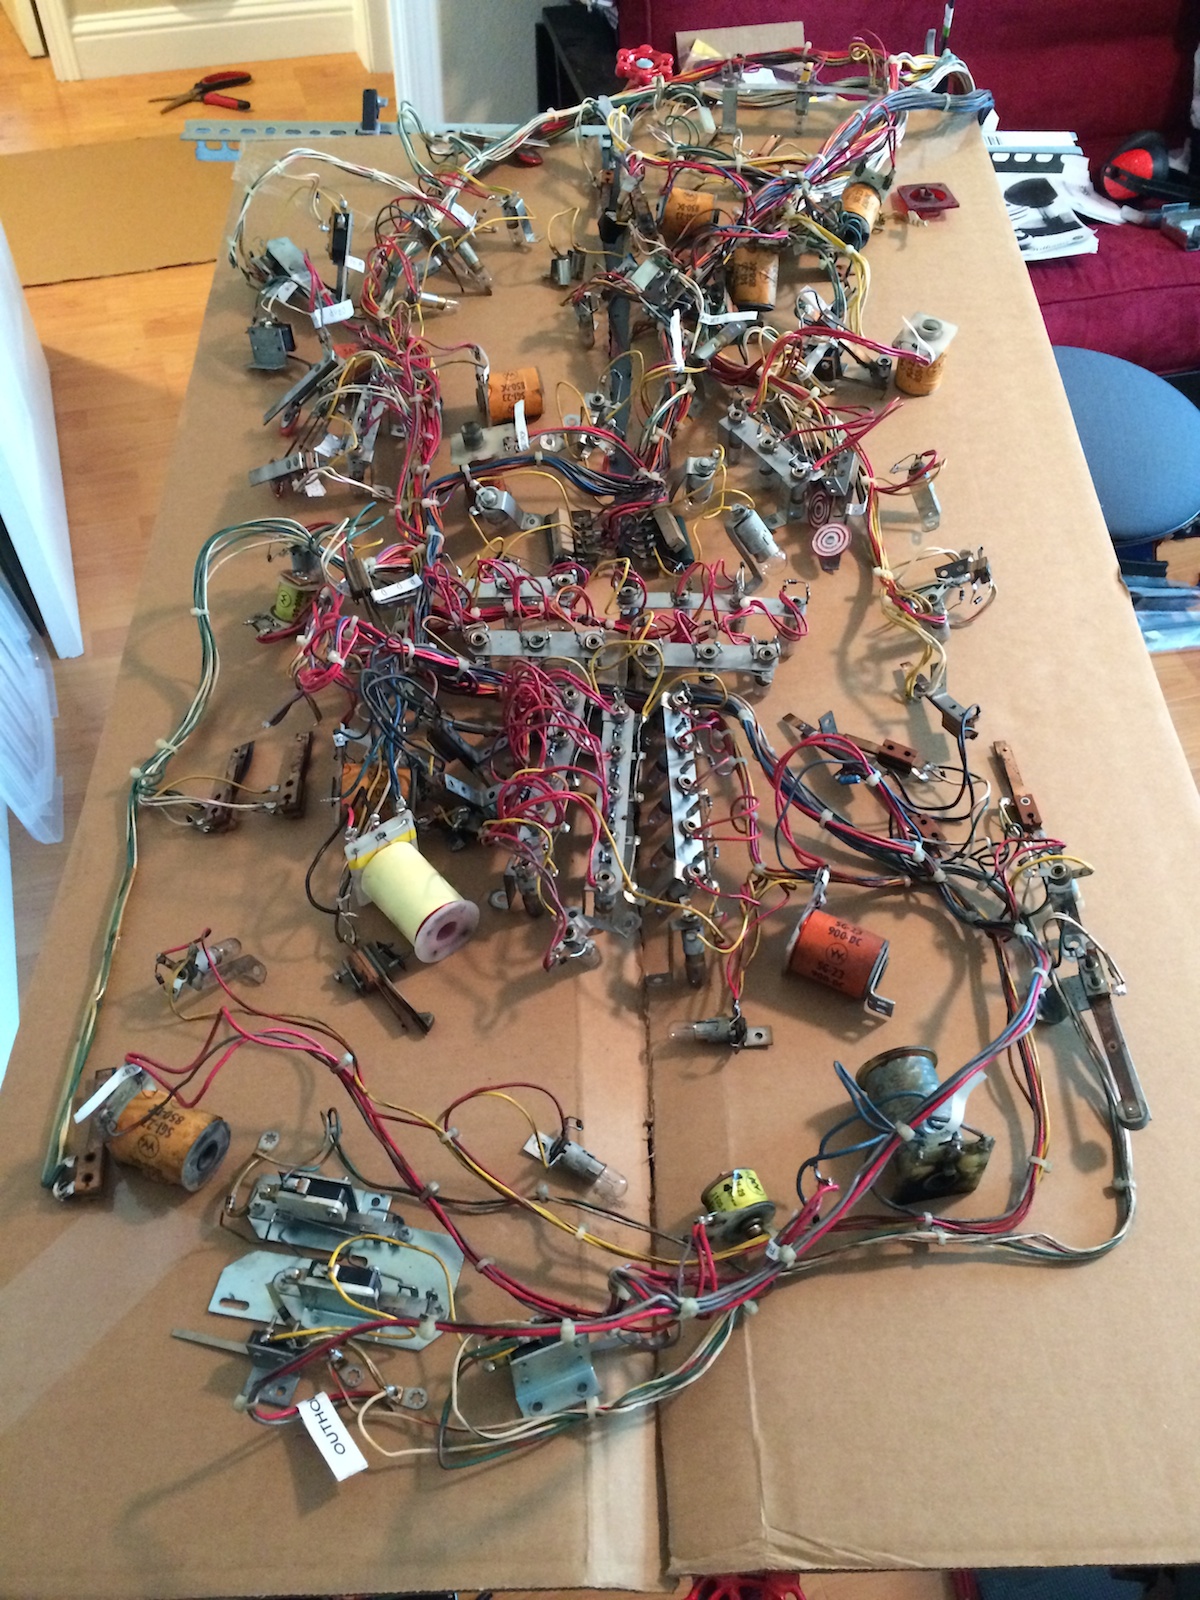
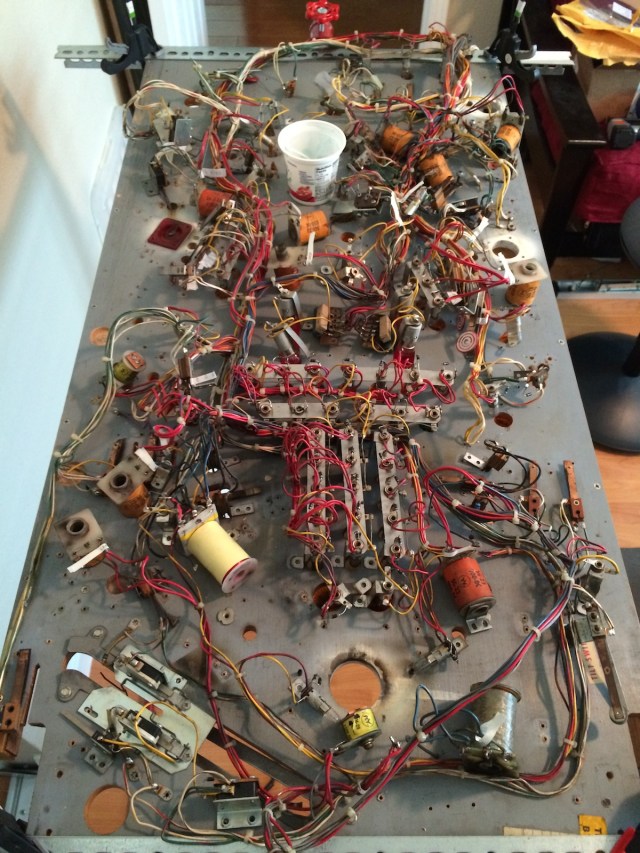
Here’s the old playfield on the rotisserie – every component except the ball through ball guide is unattached and simply sitting on the playfield. Rotating the rotisserie at this point would be a disaster 🙂

TransferredWiringHarness-2

To do the actual transfer, I used an old playfield shipping box cut into three pieces – two flaps half the size of the playfield, and one full-size piece. The idea was to slide the cardboard between the playfield and the wiring harnesses, then lift the cardboard up to do the transfer. I figured the less sliding of cardboard the better, so I used the half-sized pieces first, sliding them in from each side. Here’s the first side done:

TransferredWiringHarness-3

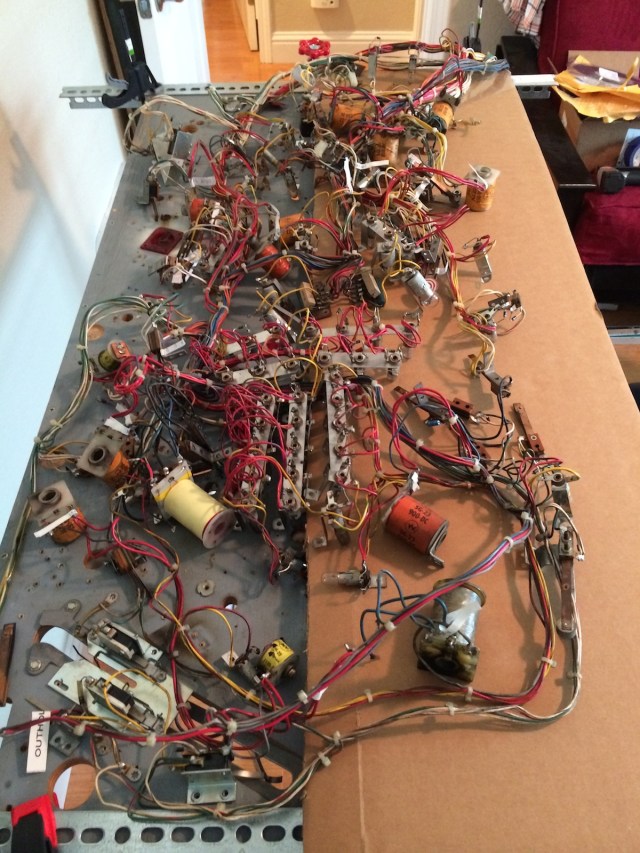
Then the same thing on the other side:

TransferredWiringHarness-4

And finally I slid the full-size piece underneath the two half-size ones, giving extra strength to the whole contraption. Here’s everything ready for the transfer:

TransferredWiringHarness-5

I got a helping hand to transfer the whole lot onto the new playfield, then slid out the cardboard pieces very carefully one at a time, and voilà!

TransferredWiringHarness-6

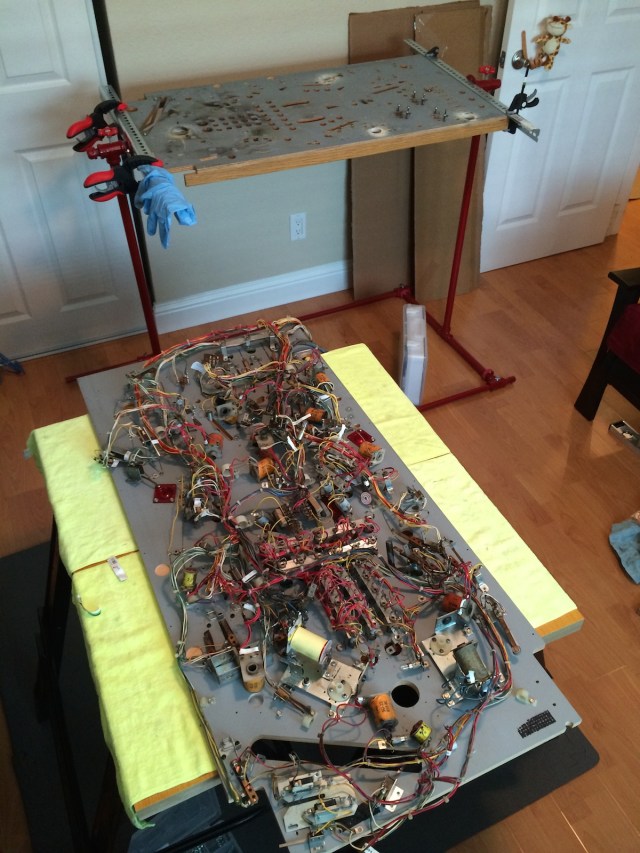
That’s how it landed just after removing the cardboard. The alignment is not perfect, but very close! It was a pretty simple matter of tugging on the major arteries of the wiring harnesses to align them with the cable clamps. After that, the individual pieces pretty much fell straight into place! It’s amazing how the wires have memory and seem “happy” to be back in the exact correct position 🙂

Posted in Space Shuttle | Tagged , , , | 3 Comments

Progress on Space Shuttle Pinball Playfield Swap – 3/5/2014

It may not look like much, but I’ve spent some more time on the Space Shuttle playfield swap. Brackets are coming off the old playfield and getting placed/pre-drilled onto the new one. More GI wiring is getting transferred over. And I’m pre-drilling the mounting holes for all the lamp sockets and some of the non-critically-positionned switches. Things are coming along nicely!

MoreGI-2

Below is the old playfield. As I said, it may not look like much progress on the surface, but if you look closely you’ll see that almost everything on there is no longer fastened down. I’m getting pretty close to be being able to transfer the whole wiring harness over.

MoreGI-1

Posted in Space Shuttle | Tagged , , , , , | 3 Comments